EDITING OPTIONS
4.2
Settings
Under Settings, there are various options for editing your Panopto video. The functions Quiz Results and Streams are particularly important when using Panopto. These sub-sections are explained in more detail below. Please note that only particularly relevant aspects are dealt with in each case in order to keep things as simple as possible.
Move the cursor over the relevant video to select the desired editing option.
A. Overview
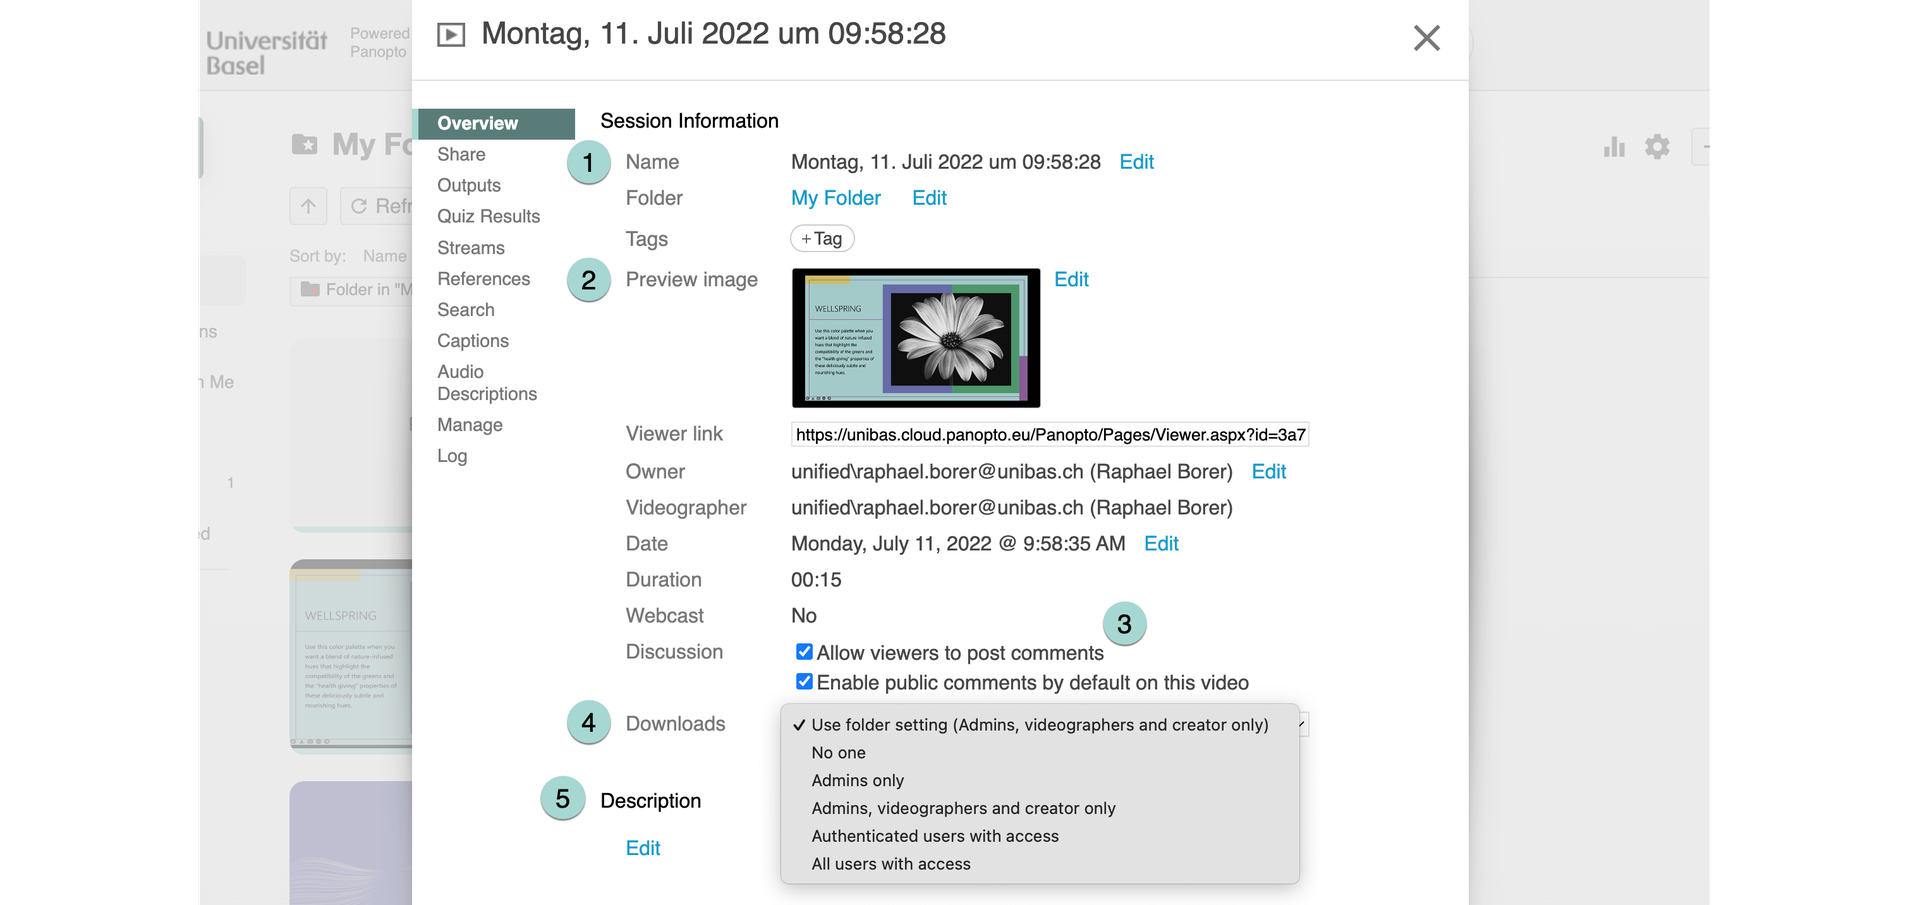
In the Overview, you can change session information such as the name (1) of the recording, the preview image (2) (which already has to be saved in a folder on your computer) or the date, and you can allow comments (3) to be published or the video to be downloaded (4).
Under description (5), you have the option of explaining the content of your video in more detail.
 If you want to make your video available for only a certain period of time, you can do so under availability.

B. Quiz Results
Under Settings > Quiz Results, you will be able to see any quiz results that appear in your video. For more information on creating quizzes, go to 5.3 Quiz. If you have created a quiz that users have completed, you will see a summary of the results here.

1. General
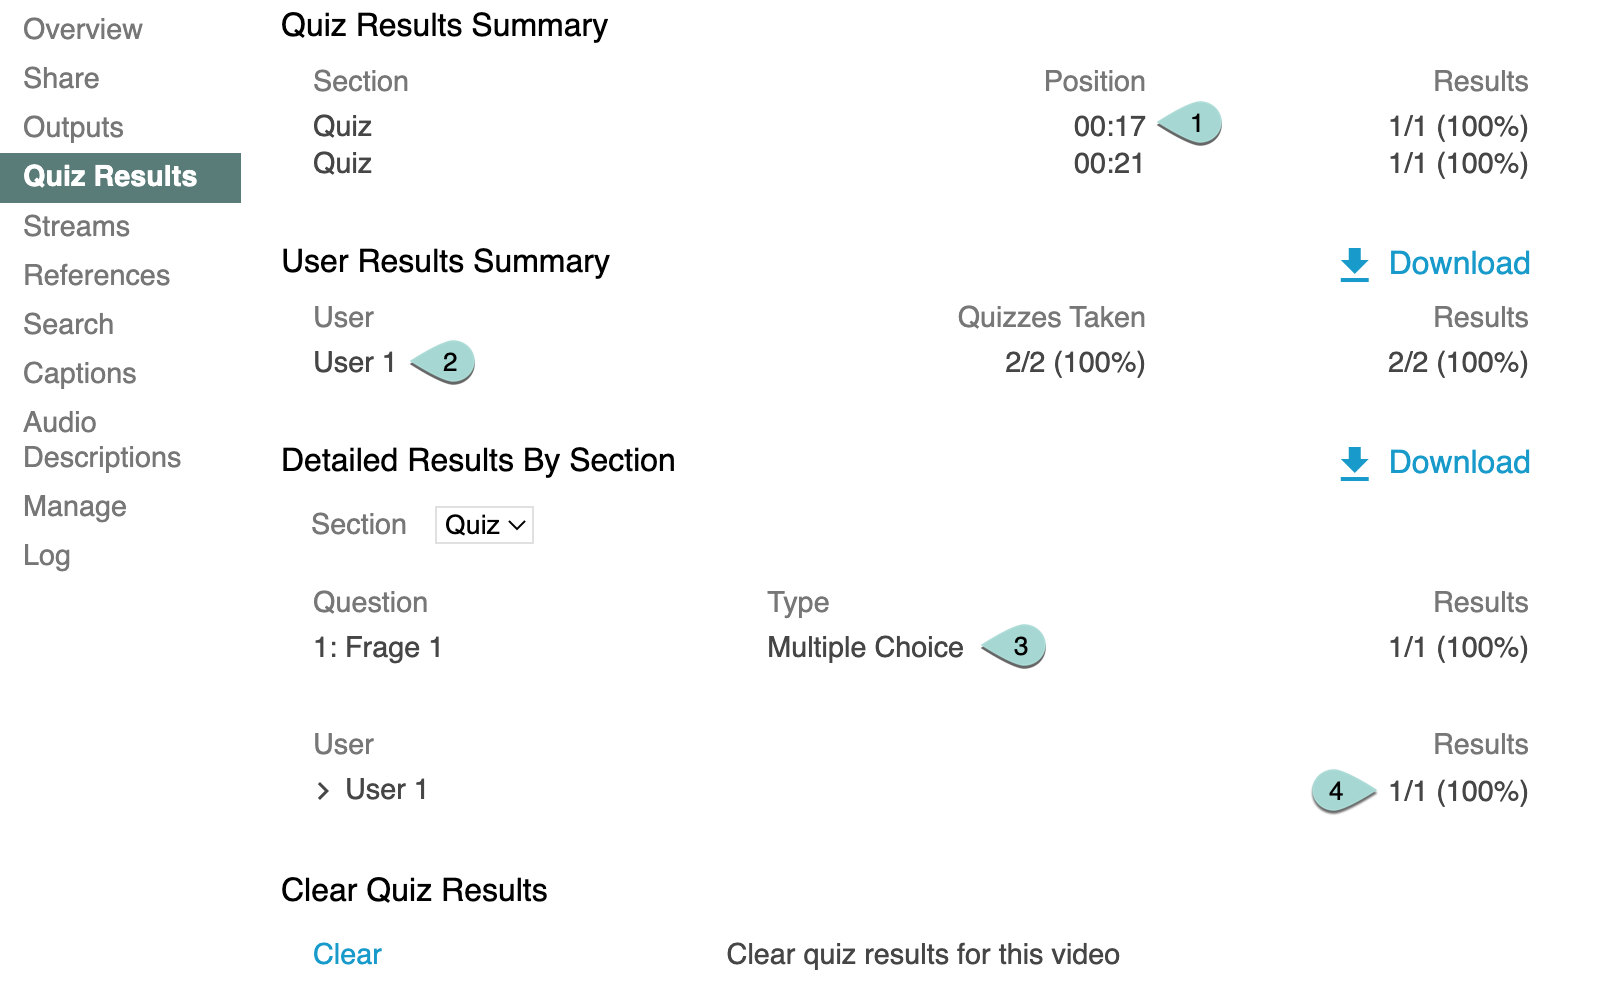
At the top, you can see which quiz the results are from. It’s best to give the quizzes different names to be able to distinguish between them. You can also see at which position or point in time the quiz appears in your video, and you get an overview over the results.
2. User
Under User Results, you can see the results of each user. How many quizzes has each user completed and how did they score? You can also download this information.
3. Information on individual questions
Under Detailed results by section, you can see all the information on the individual questions. What is the question? What type of question is it? How did the users score in each question? You can also download this information.
4. Results
Under Results, you can see a list of users and their results across all quizzes.
C. Streams
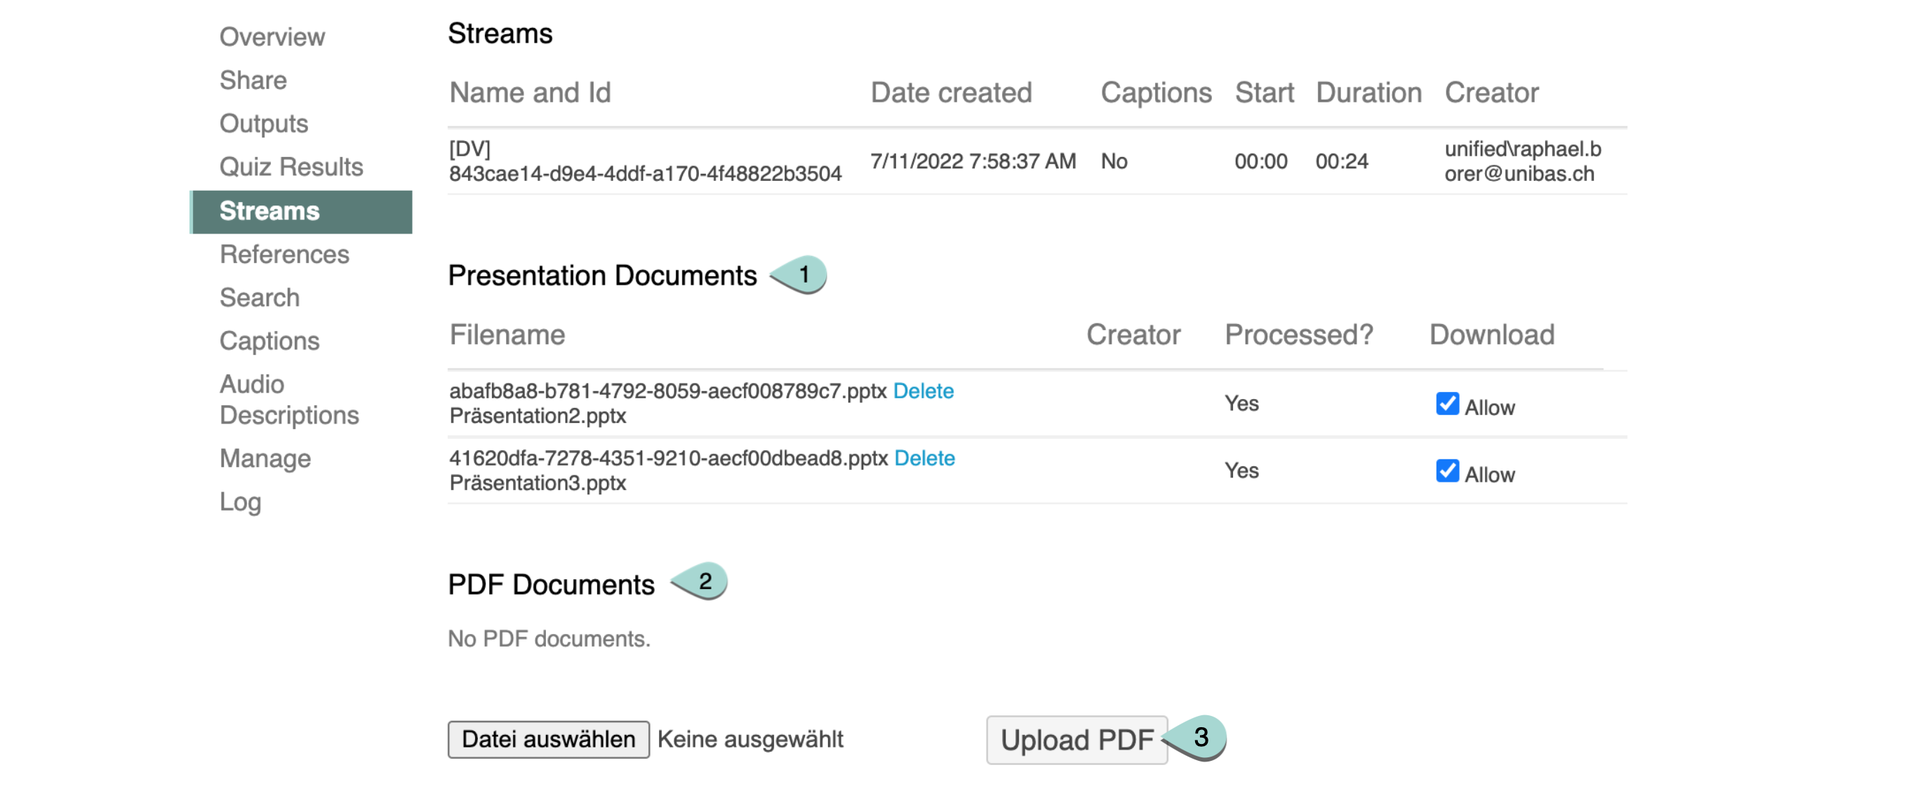
Videos often have associated documents which you might want to offer for download, for example presentations or PDFs. You can do this under Settings > Streams. Here you will be able to see which PowerPoint presentations have been added to the video (you cannot add PowerPoint documents here, you can only view those already attached. To add PowerPoint presentations, go to Edit next to your video. For more information, see the Edit chapter). You can, however, upload a PDF document here. For example, you could save your PowerPoint presentation as a PDF and upload it here:

1. Presentation Documents
This shows you any presentations that you have added to the video (see the Edit chapter). You can delete the presentations or decide whether or not to allow downloading by ticking the Allow checkbox.
2. PDF Documents
You can attach PDF documents here. Click on Browse, select the desired file on your computer and then upload it by clicking on 3 – Upload PDF file . Once uploaded, it will appear in the list above. You can also delete unwanted files here.
D. Outputs

1. View Session
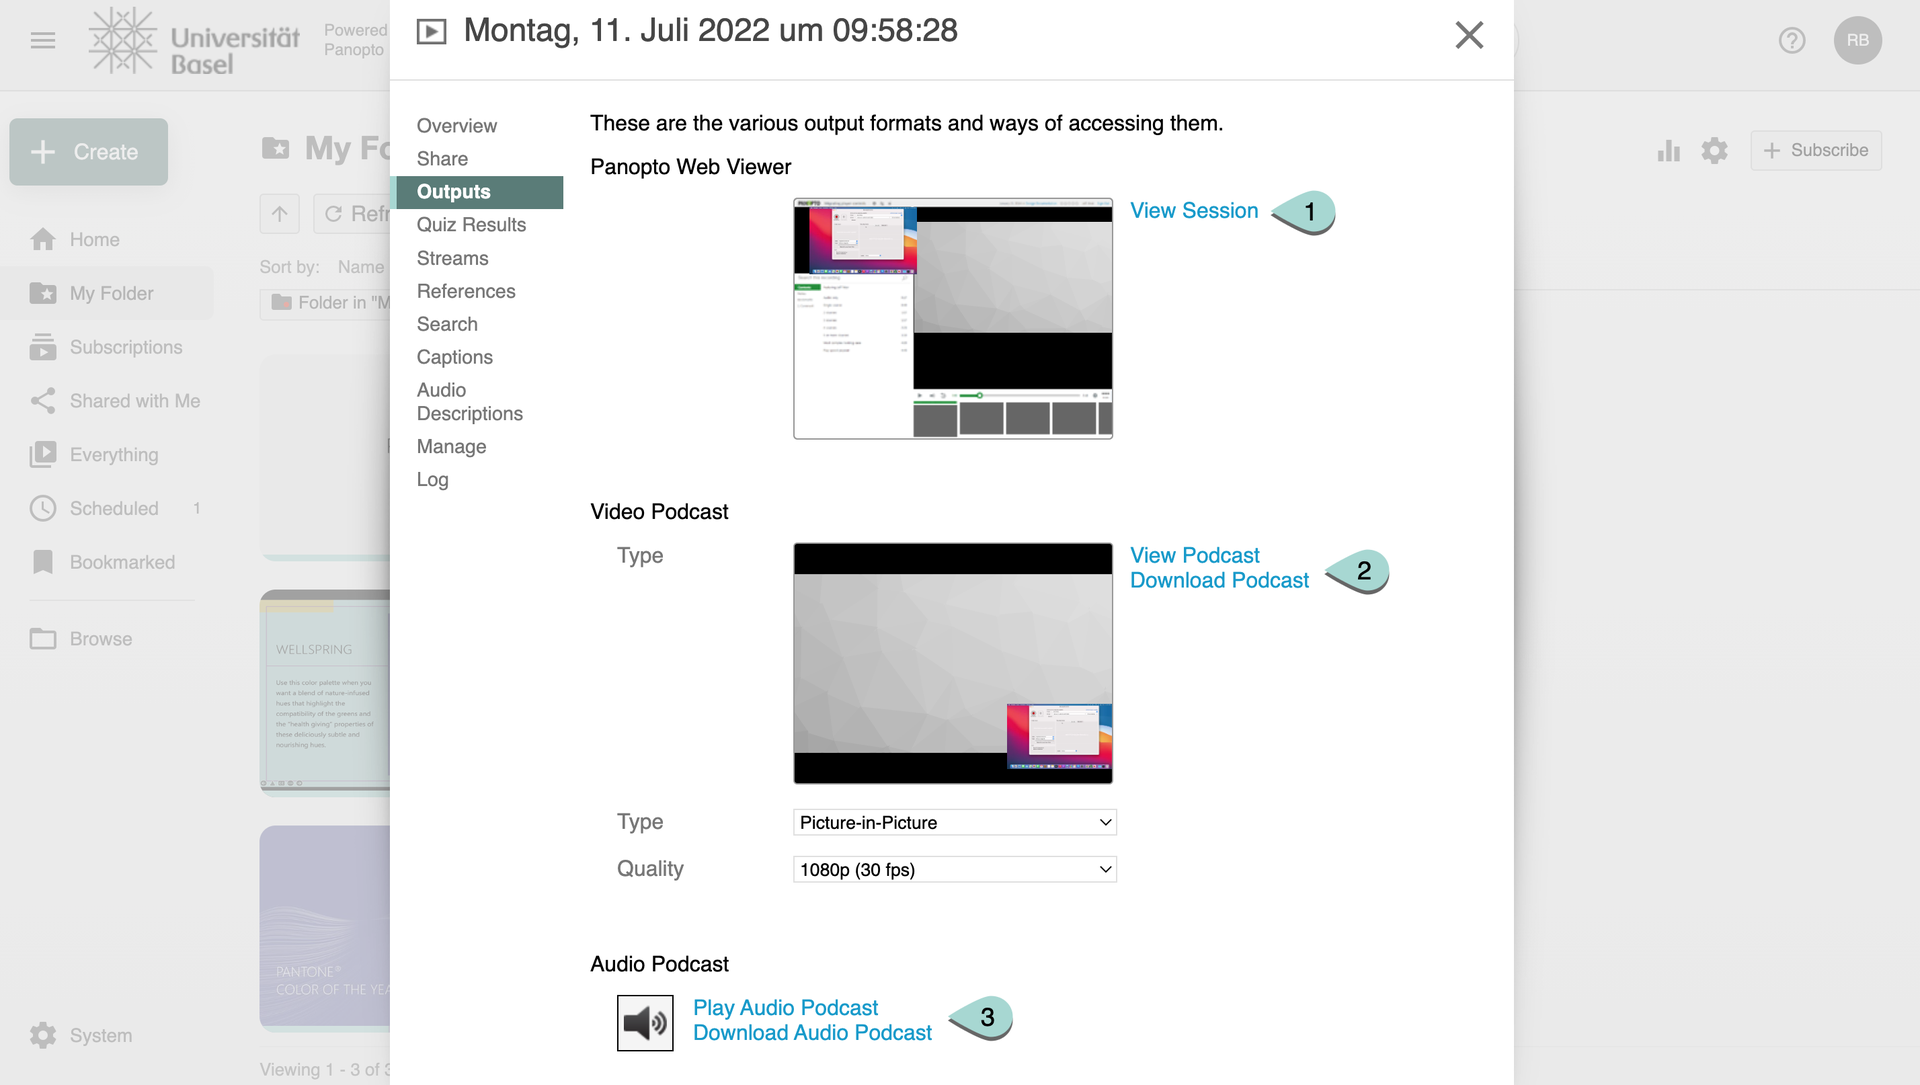
Here you can see the web-viewer. Here you also find discussions, notes and bookmarks to the video.
2. View or download podcast
Here you can download your video as a video podcast or show it on the web. However, the interaction possibilities are lost and only video and audio are available.
3. Play or download audio podcast
For reasons of space or irrelevance, you can also download the audio track as a podcast or view it on the web. In this case, however, any presentations are no longer available.
License
University of Basel

