RECORDING
3.5
Uploading Media
If you have an existing video on your computer that you would like to share via Panopto, you can upload it to ADAM as explained below.
A. Upload Media to Panopto via ADAM
If you have already set up a Panopto Object in ADAM, you can jump straight to step 6 in these instructions.
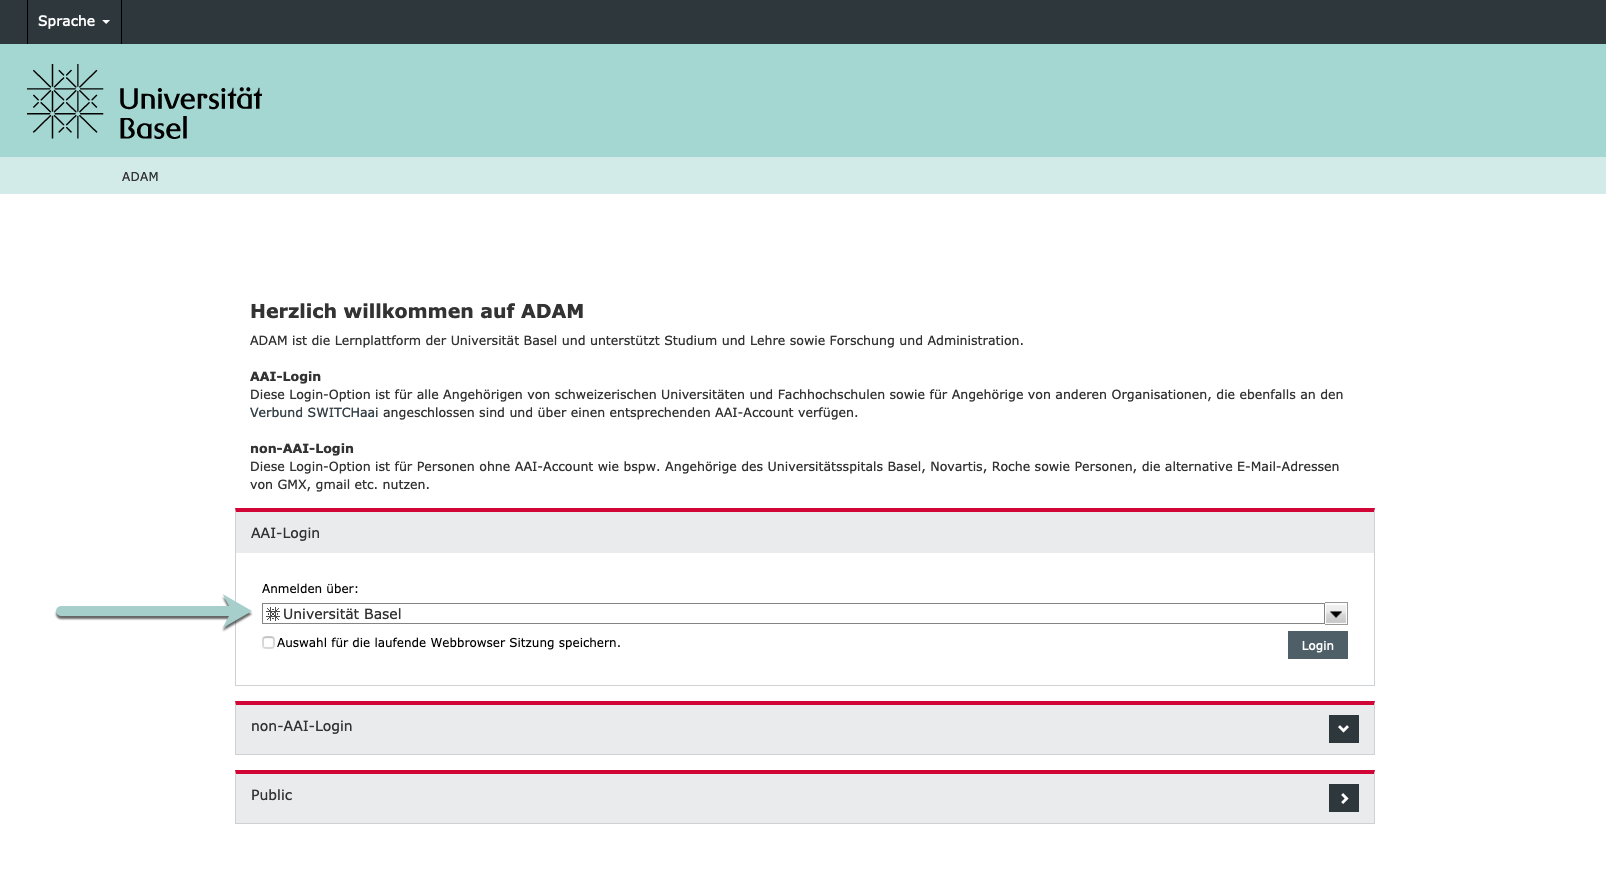
- Log in to ADAM with your SWITCH edu-ID.
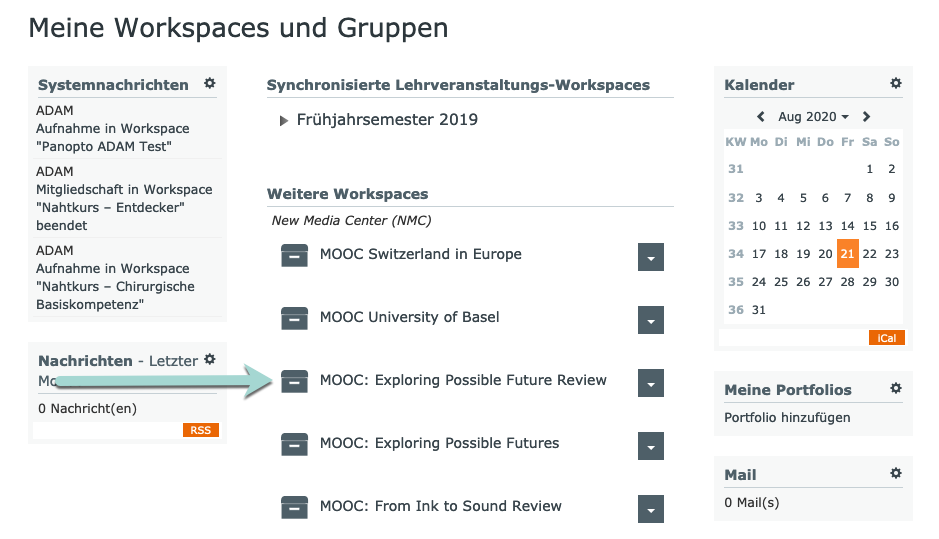
- Open the folder assigned to your lecture or seminar; you will find it in your ADAM workspace. If applicable, open the subfolder where you (and your students) will later want to access the lecture.
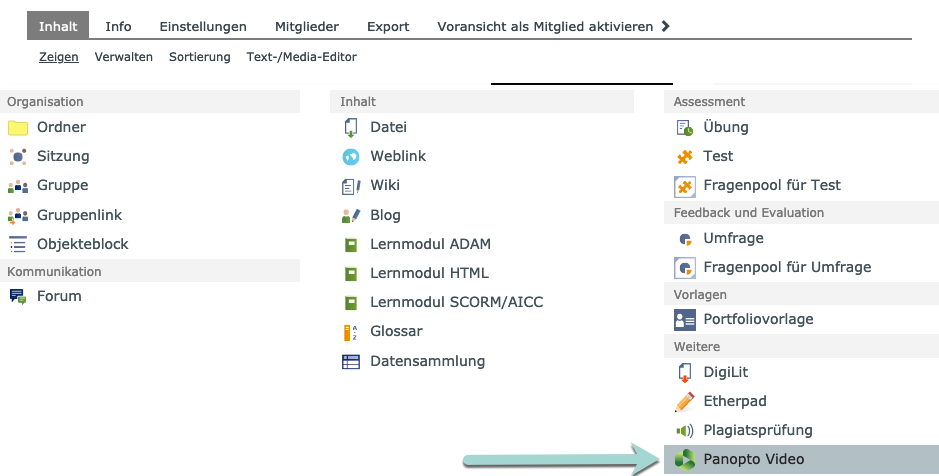
- Click on the button Add New Object / Neues Objekt hinzufügen at the top right.

- A drop-down panel will open up. Under the heading Other / Weitere, click on Panopto Video.
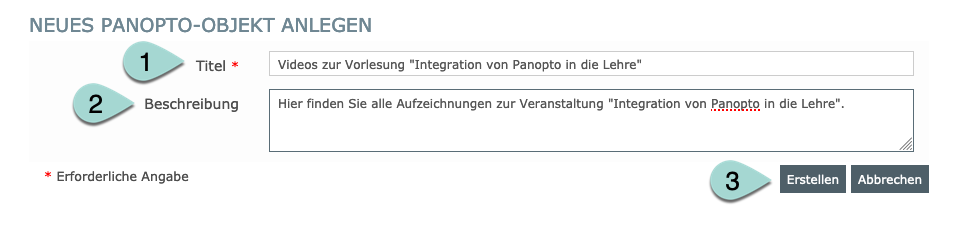
- You are about to create a new Panopto Object (= that’s the folder where you will later find your video). Give your folder a title (1) and, optionally, a description (2). Make sure to choose a title that is unique and readily identifiable, so that you can find it easily later on (for example “Lecture on Behavioral Psychology”). You could also use the course number, date or, for example, the topic of the lecture series. Then click on Create / Erstellen (3).
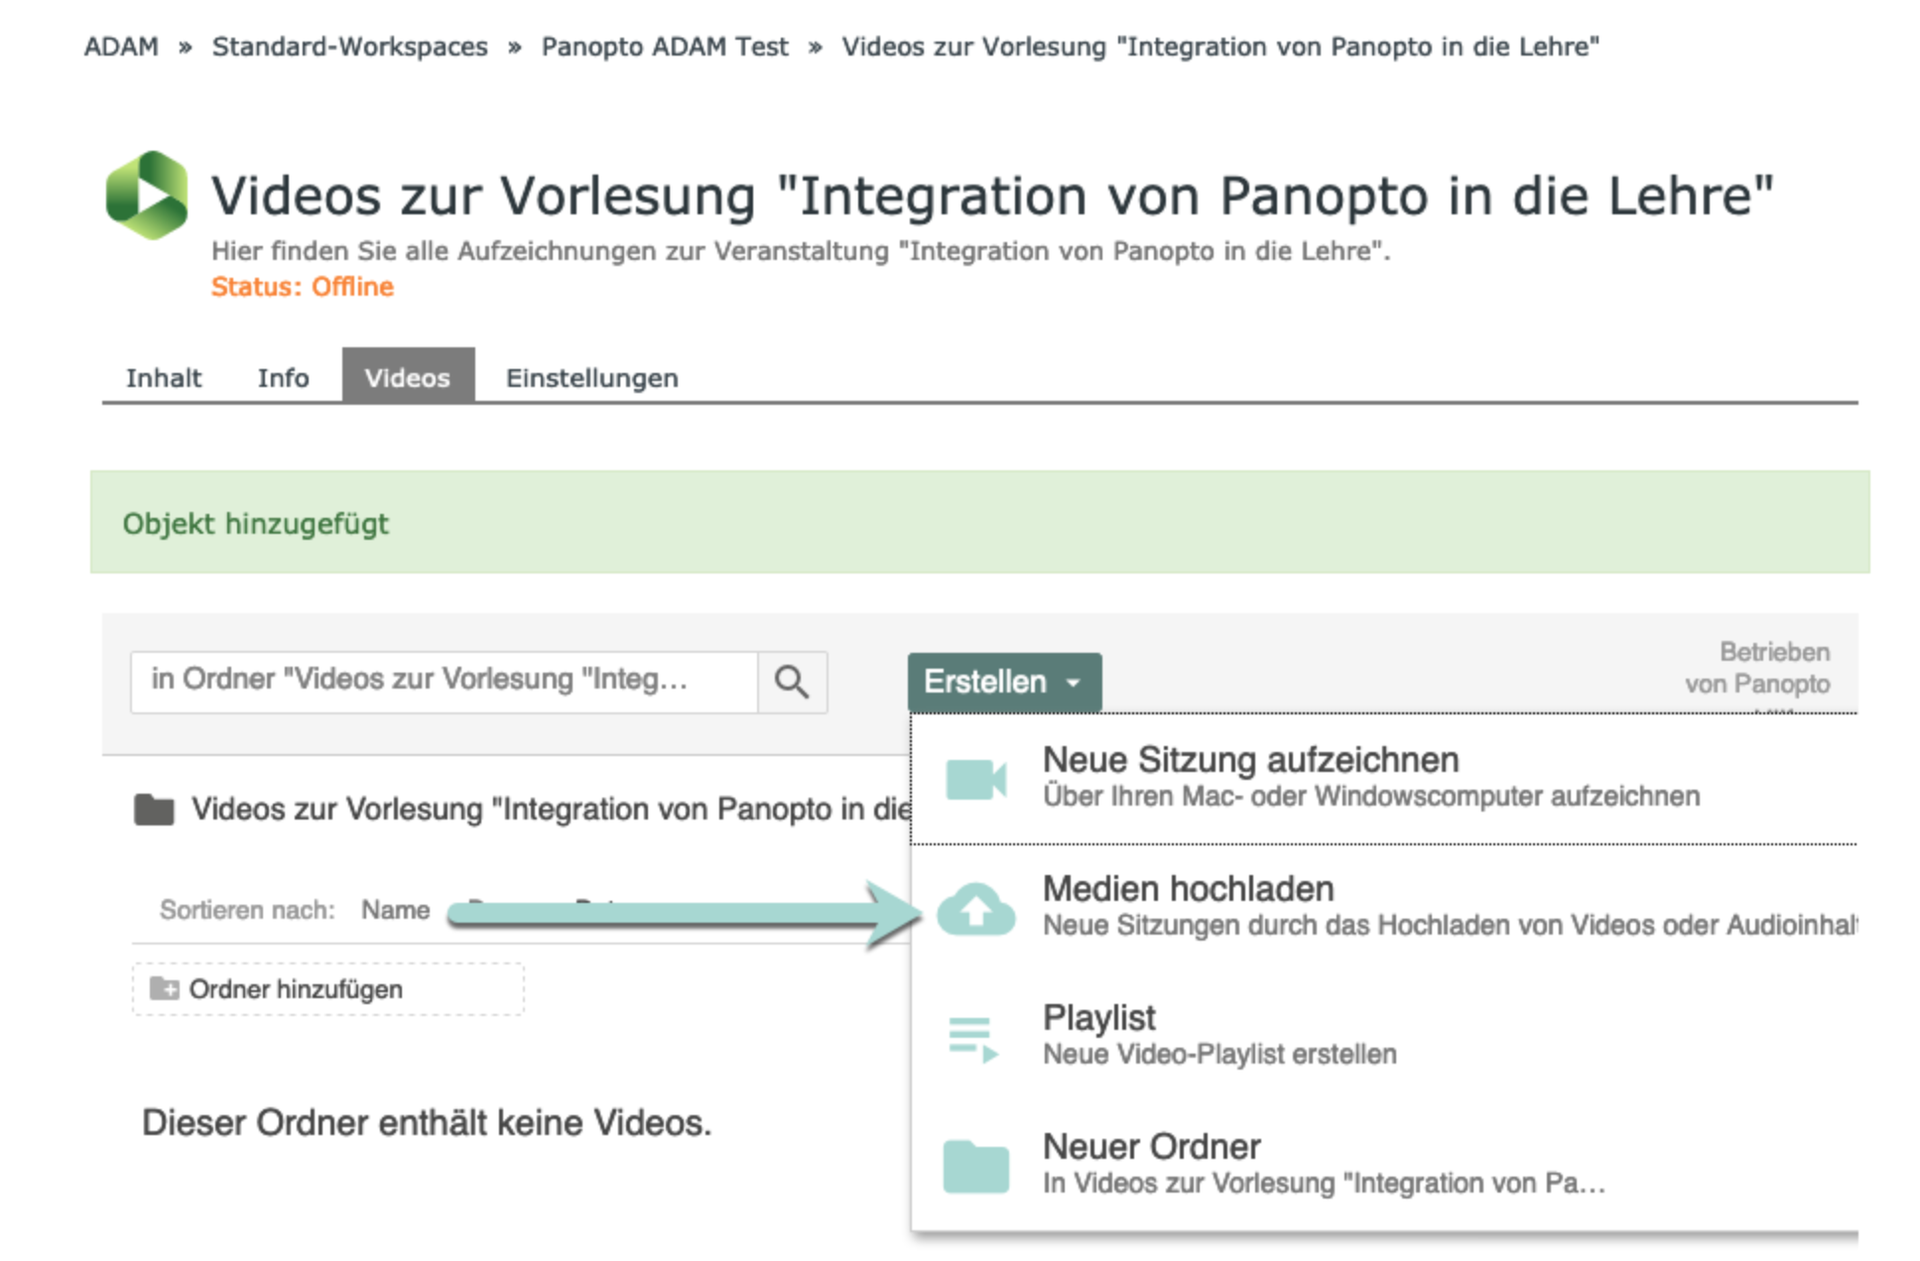
- You are now in the folder that you just created. Click on the button Create / Erstellen…
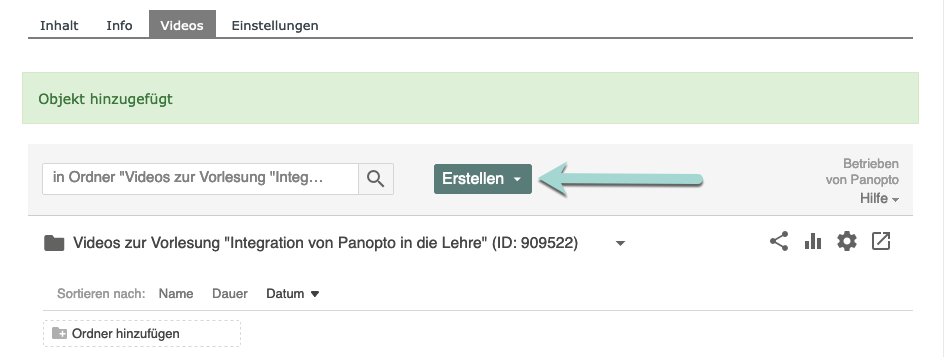
… and in the drop-down menu, choose Upload media / Medien hochladen.
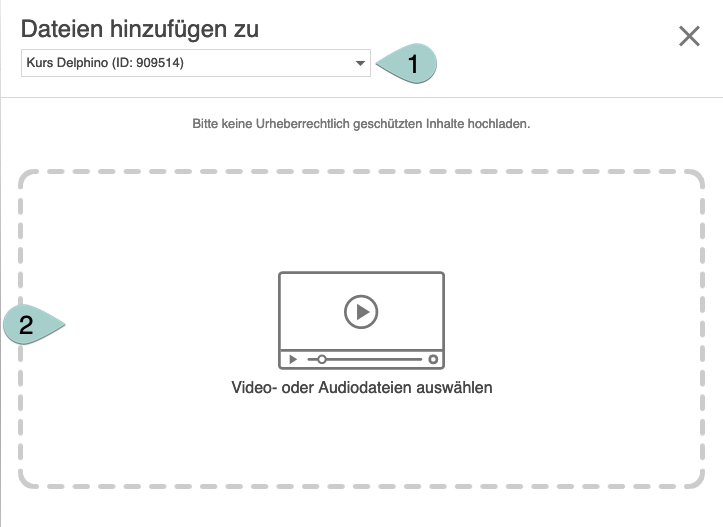
- A window will open and you will see the folder where the file will be saved (1). (If required, you can choose another folder here.)
You can either “Drag and Drop” the media file that you want to share into the area marked by (2), or you can click on the area and select your media file with the file manager.
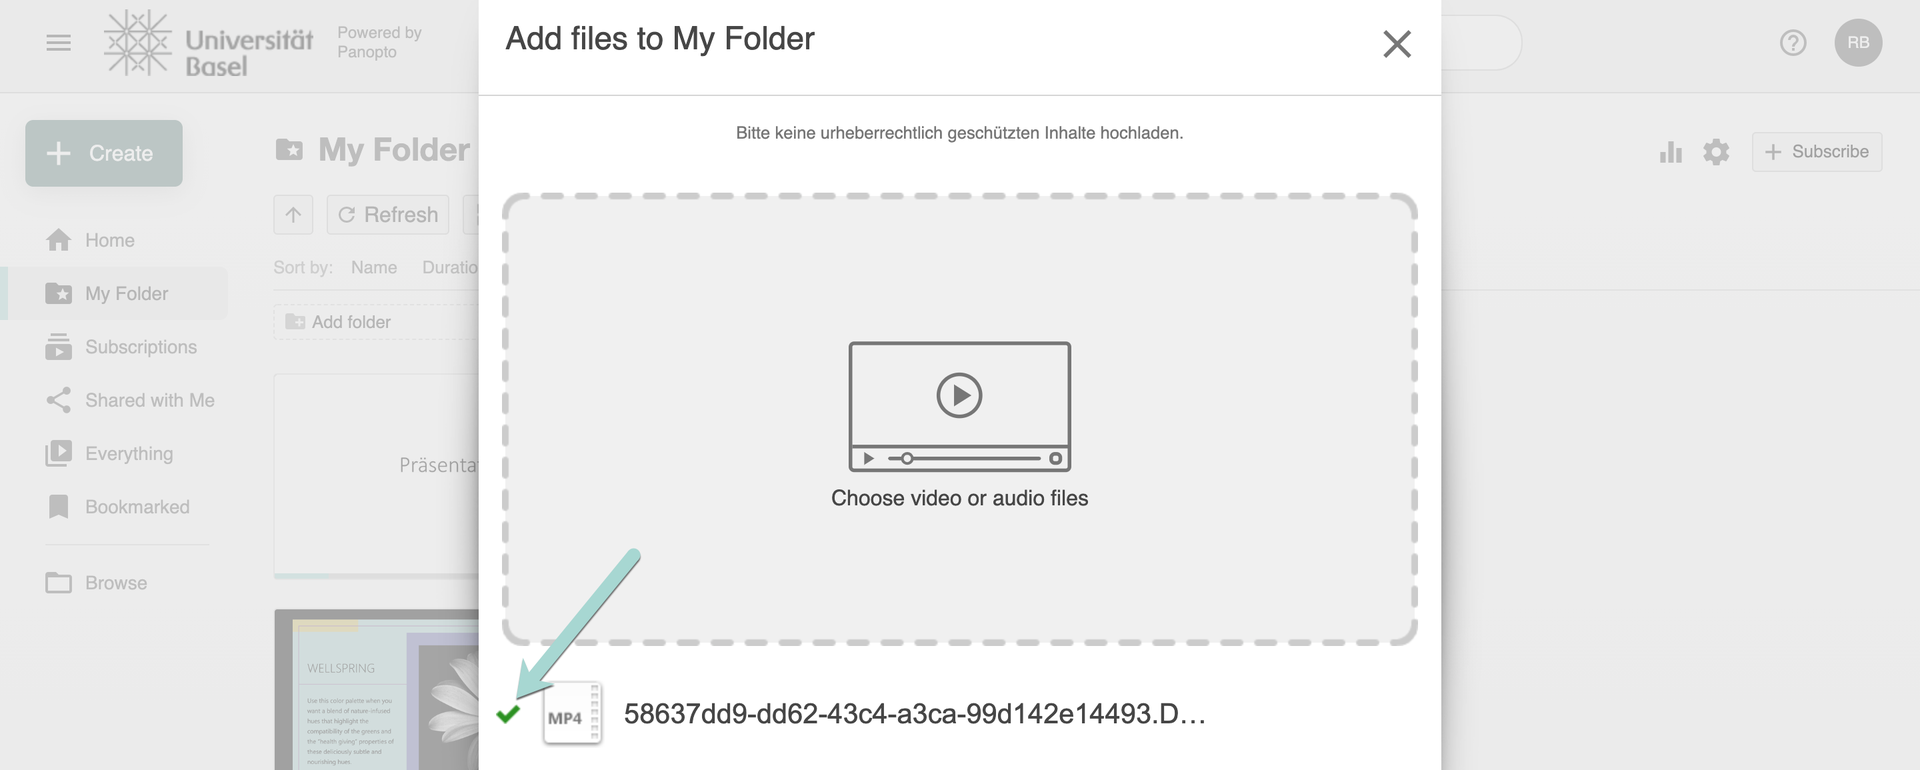
The file will then be uploaded. Once the process is complete, a green check mark will appear next to the file name.
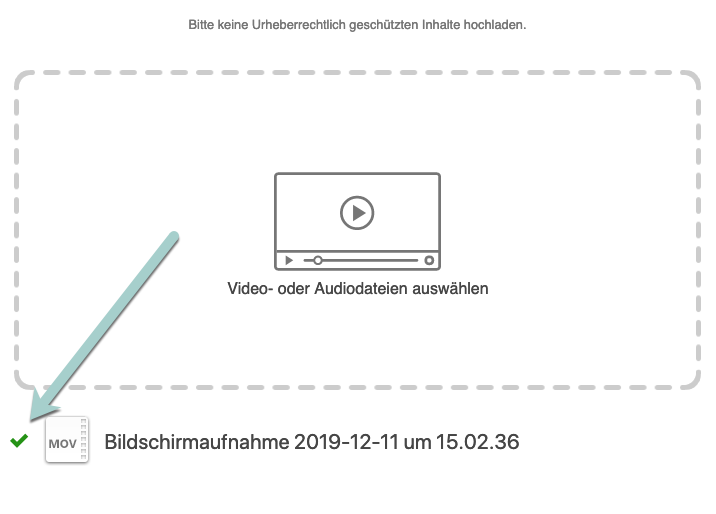
The file is now stored in the folder you specified. You can now close the file upload window.
B. Upload media directly to Panopto
- Log in to Panopto with your Unibas username (= Email address) and password.
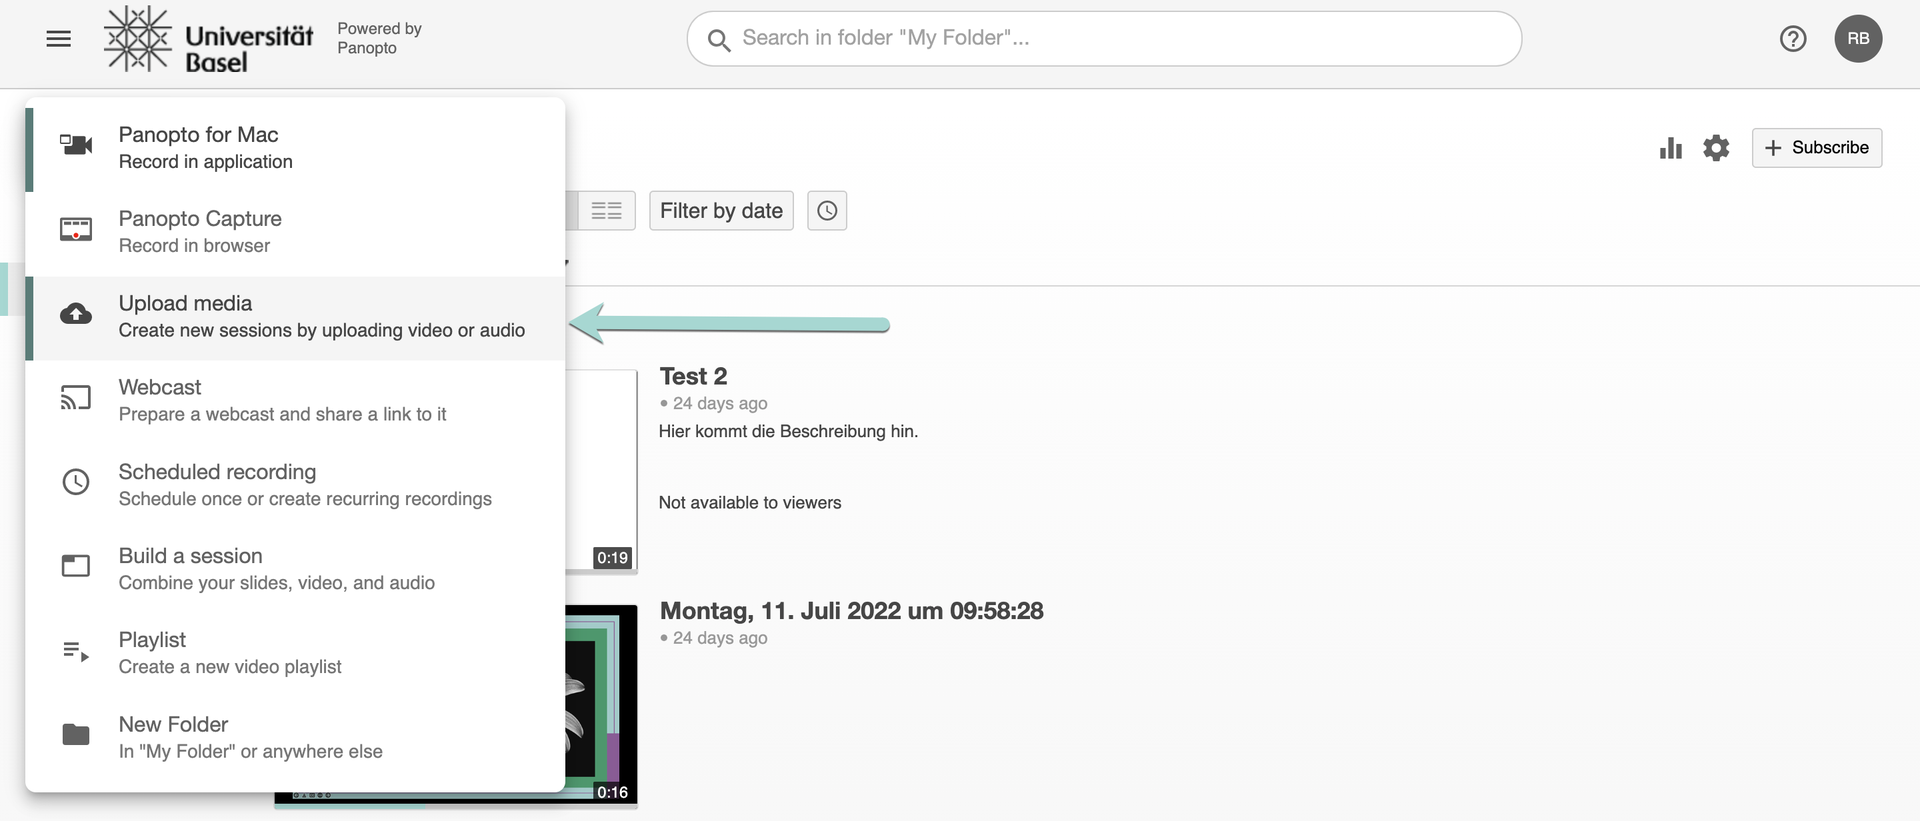
- Click on the button Create / Erstellen…
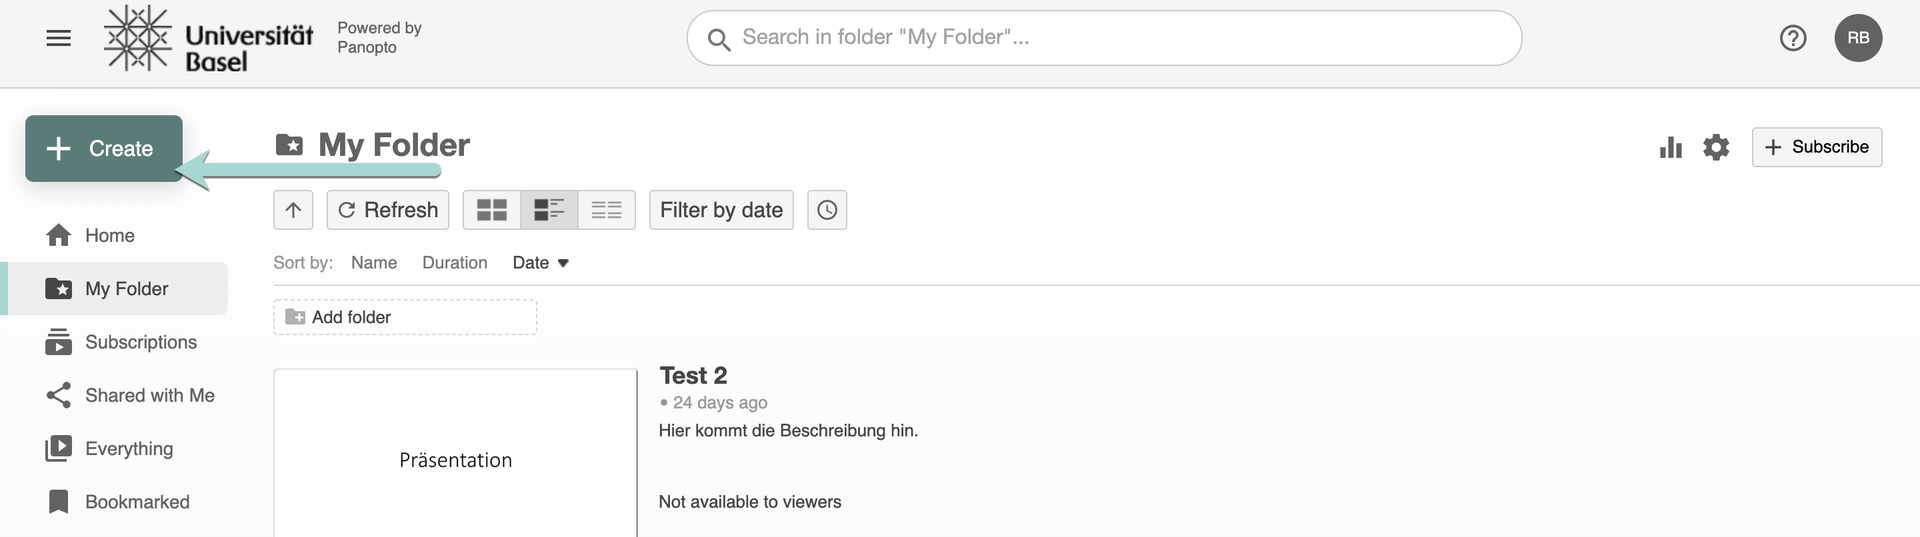 … and in the drop-down menu, choose Upload media / Medien hochladen.
- A window will open and you will see the folder where the file will be saved (1). (If required, you can choose another folder here.)
You can either “Drag and Drop” the media file that you want to share into the area marked by (2), or you can click on the area and select your media file with the file manager.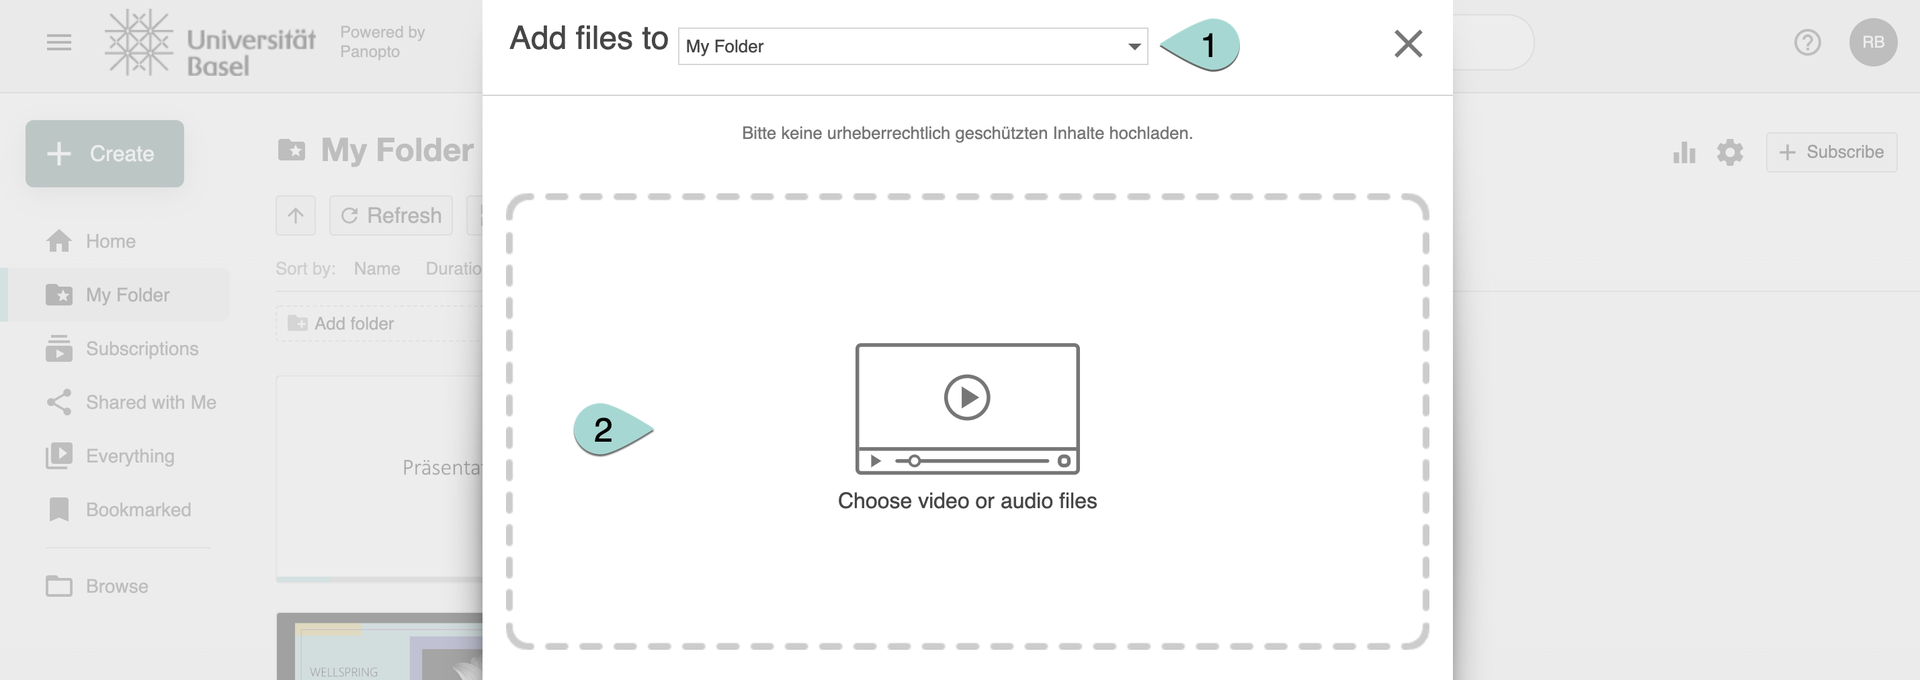 The file will then be uploaded. Once the process is complete, a green check mark will appear next to the file name.
C. Copying an existing Panopto video to a new Panopto object on ADAM
If you want to copy a video that already exists on Panopto to a new Panopto object on ADAM, you can proceed as follows:
- Create the new Panopto object on ADAM (an associated folder is automatically created on Panopto).
- Switch to Panopto. Log in there and search for the existing video that you want to copy to the new Panopto object.
- Tick the box at the top left of the preview image for the video to be copied. Additional options will now appear at the top. Click on ‘Copy’ (the symbol with the two staggered rectangles).
- A new window opens in which you can select where the video should be copied to. Select the folder that belongs to the Panopto object that you created in step 1. (The folder has the same name as the Panopto object and is located in the parent folder that has the same name as your ADAM course). Then click on ‘Copy’ in the top right-hand corner.
The video is then copied to the folder that belongs to the Panopto object. As soon as the copying process is complete, it should also be in the corresponding Panopto object on ADAM.
License
University of Basel