RECORDING
3.1
Preparing to record via ADAM
Here’s how you can prepare to record a session via ADAM.
Note: To proceed the following steps, you have got to be workspace manager on Adam.
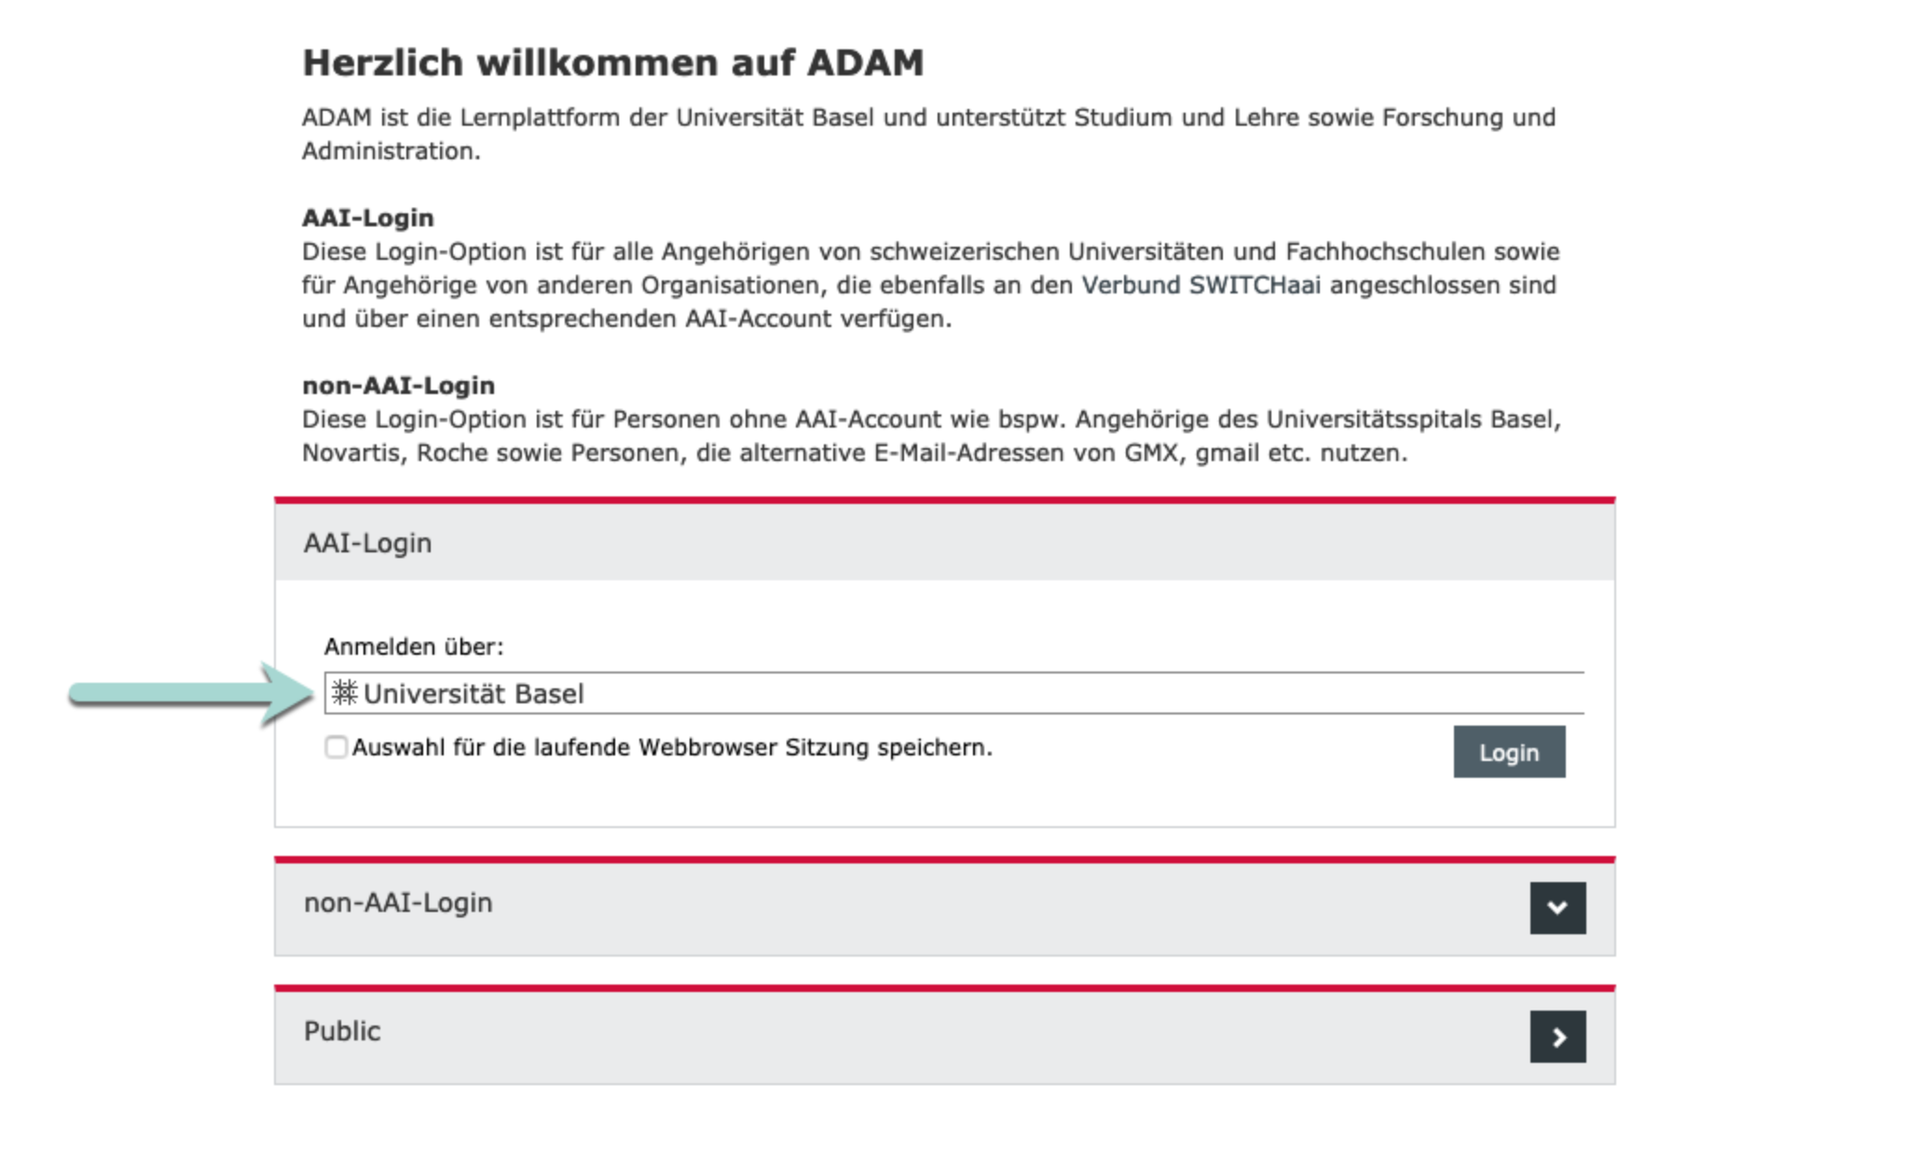
- Log in to ADAM with your SWITCH edu-ID.
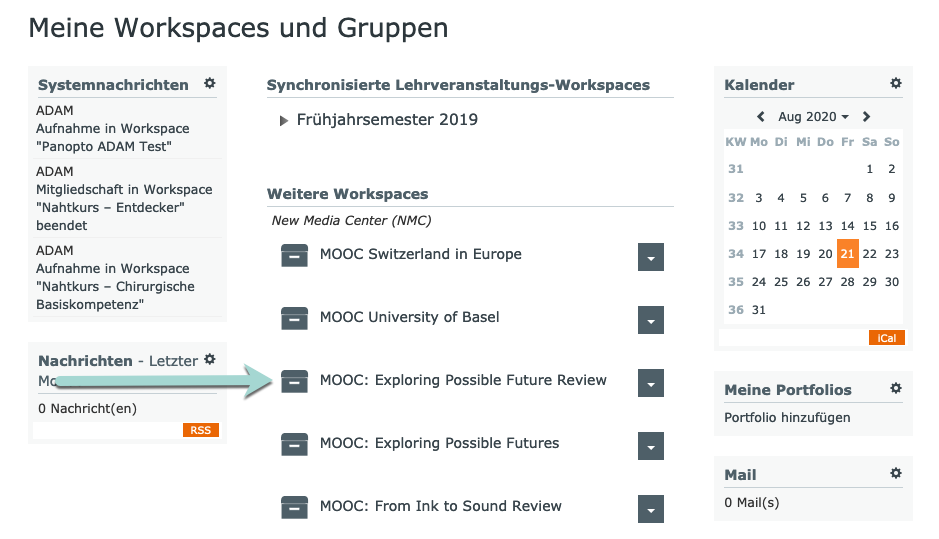
- Open the folder assigned to your lecture or seminar; you will find it in your ADAM workspace. If applicable, open the subfolder where you (and your students) will later want to access the lecture.
- Click on the button “Add New Item” at the top left and then on “Panopto”.

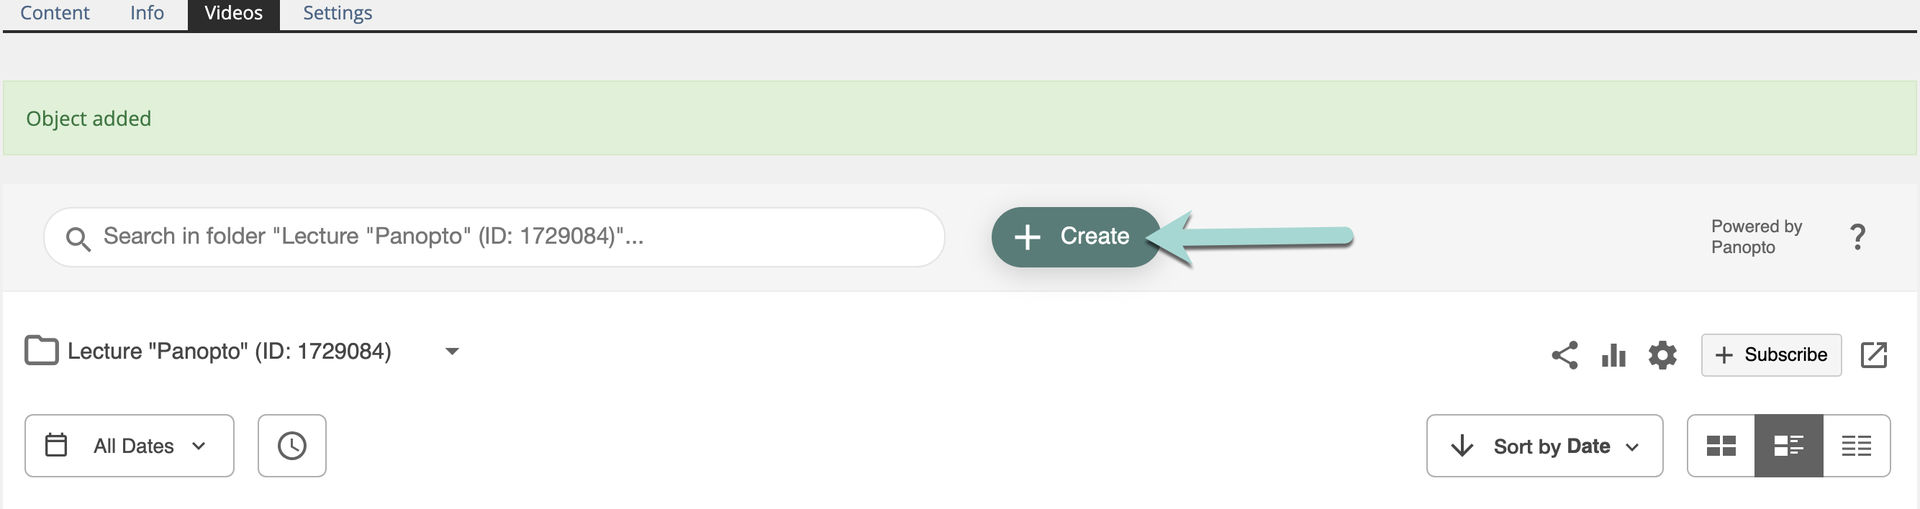
- You are about to create a new Panopto Object (= that’s the folder where you will later find your video). Give your folder a title and, optionally, a description. Make sure to choose a title that is unique and readily identifiable, so that you can find it easily later on (for example “Lecture on Behavioral Psychology”). You could also use the course number, date or, for example, the topic of the lecture series. Then click on “Create”. If you need several folders, create a separate Panopto object for each one. (Subfolders within a Panopto object are not visible on ADAM). Note: The Panopto object you have created is linked to your Panopto account. This means that the recording you create via ADAM will automatically appear on your Panopto page.
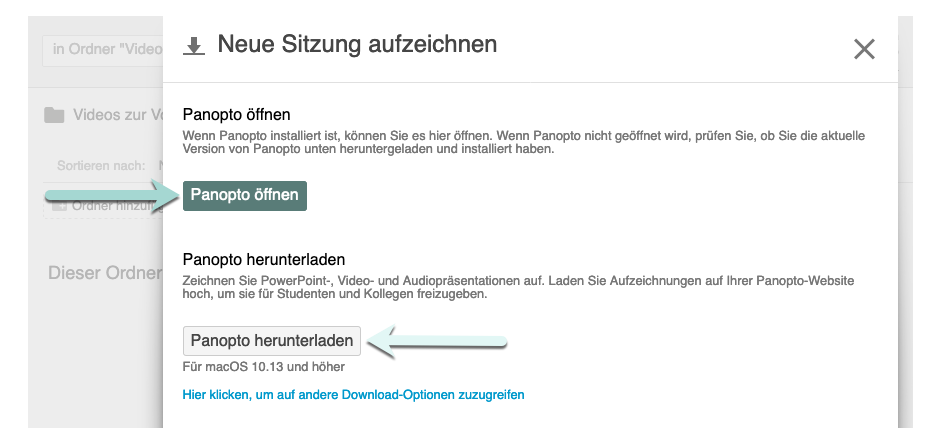
 5. You are now in the folder that you just created. Click on the button “Create”.
(1) In the drop-down menu, choose the top item “Panopto for Mac” (the label may differ) to record a video with the Panopto Client, i.e. the application on your computer.
(2) Choose the second item from the top “Panopto Capture” to record a video directly via the web browser, without installing the Panopto Client on your computer. In this case you can skip the next two steps and continue at point 9 of this page.
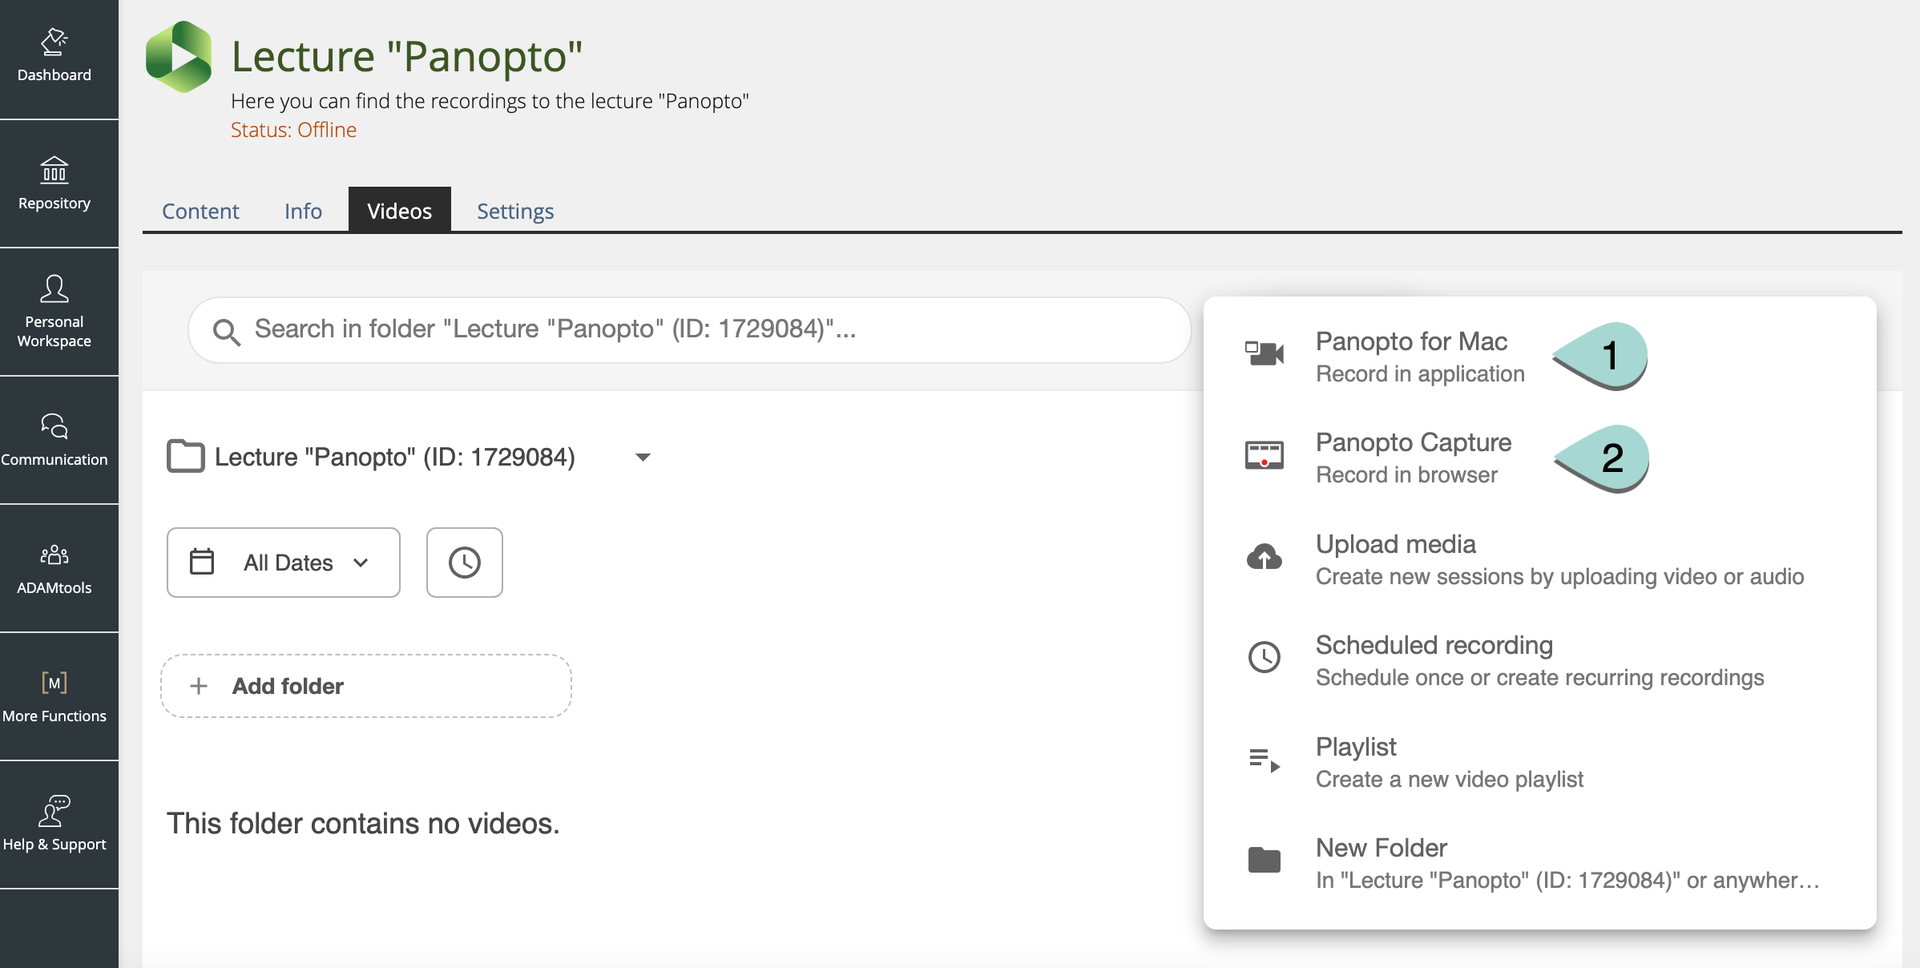
6. If you decided to record with the Panopto Client, choose “Record New Session” in the now-open window, click on “Open Panopto”. If you haven’t yet installed Panopto, choose “Download Panopto”. Download the Panopto installation file and install Panopto on your computer.
7. A window will appear and ask how the link should be opened. Choose “Panopto” und then click on “Open Link”.
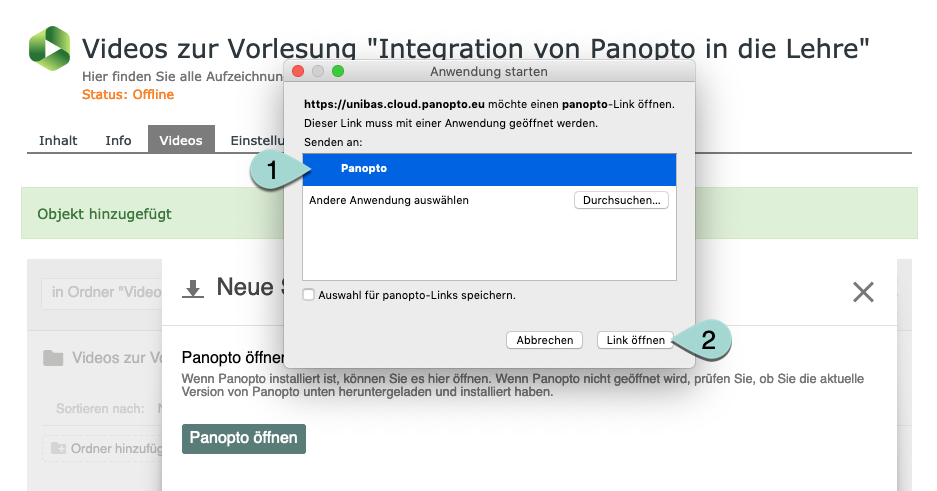
The chapter “3.2 Recording with Panopto Client for Windows or Mac” describes how you can record a session using the Panopto Client for Windows or Mac.
8. If you have chosen to record with Panopto Capture, the Panopto Capture recorder page opens up. If prompted, allow access to your camera and microphone to the browser.

The chapter “3.3 Recording with Panopto Capture” describes how you can record a session using Panopto Capture.
License
University of Basel