RECORDING
3.3
Recording with Panopto Capture
Panopto Capture only works in latest versions of the Chrome, Firefox, Edge and Safari browsers.
On the Panopto Capture page, you can set preferences to your liking.
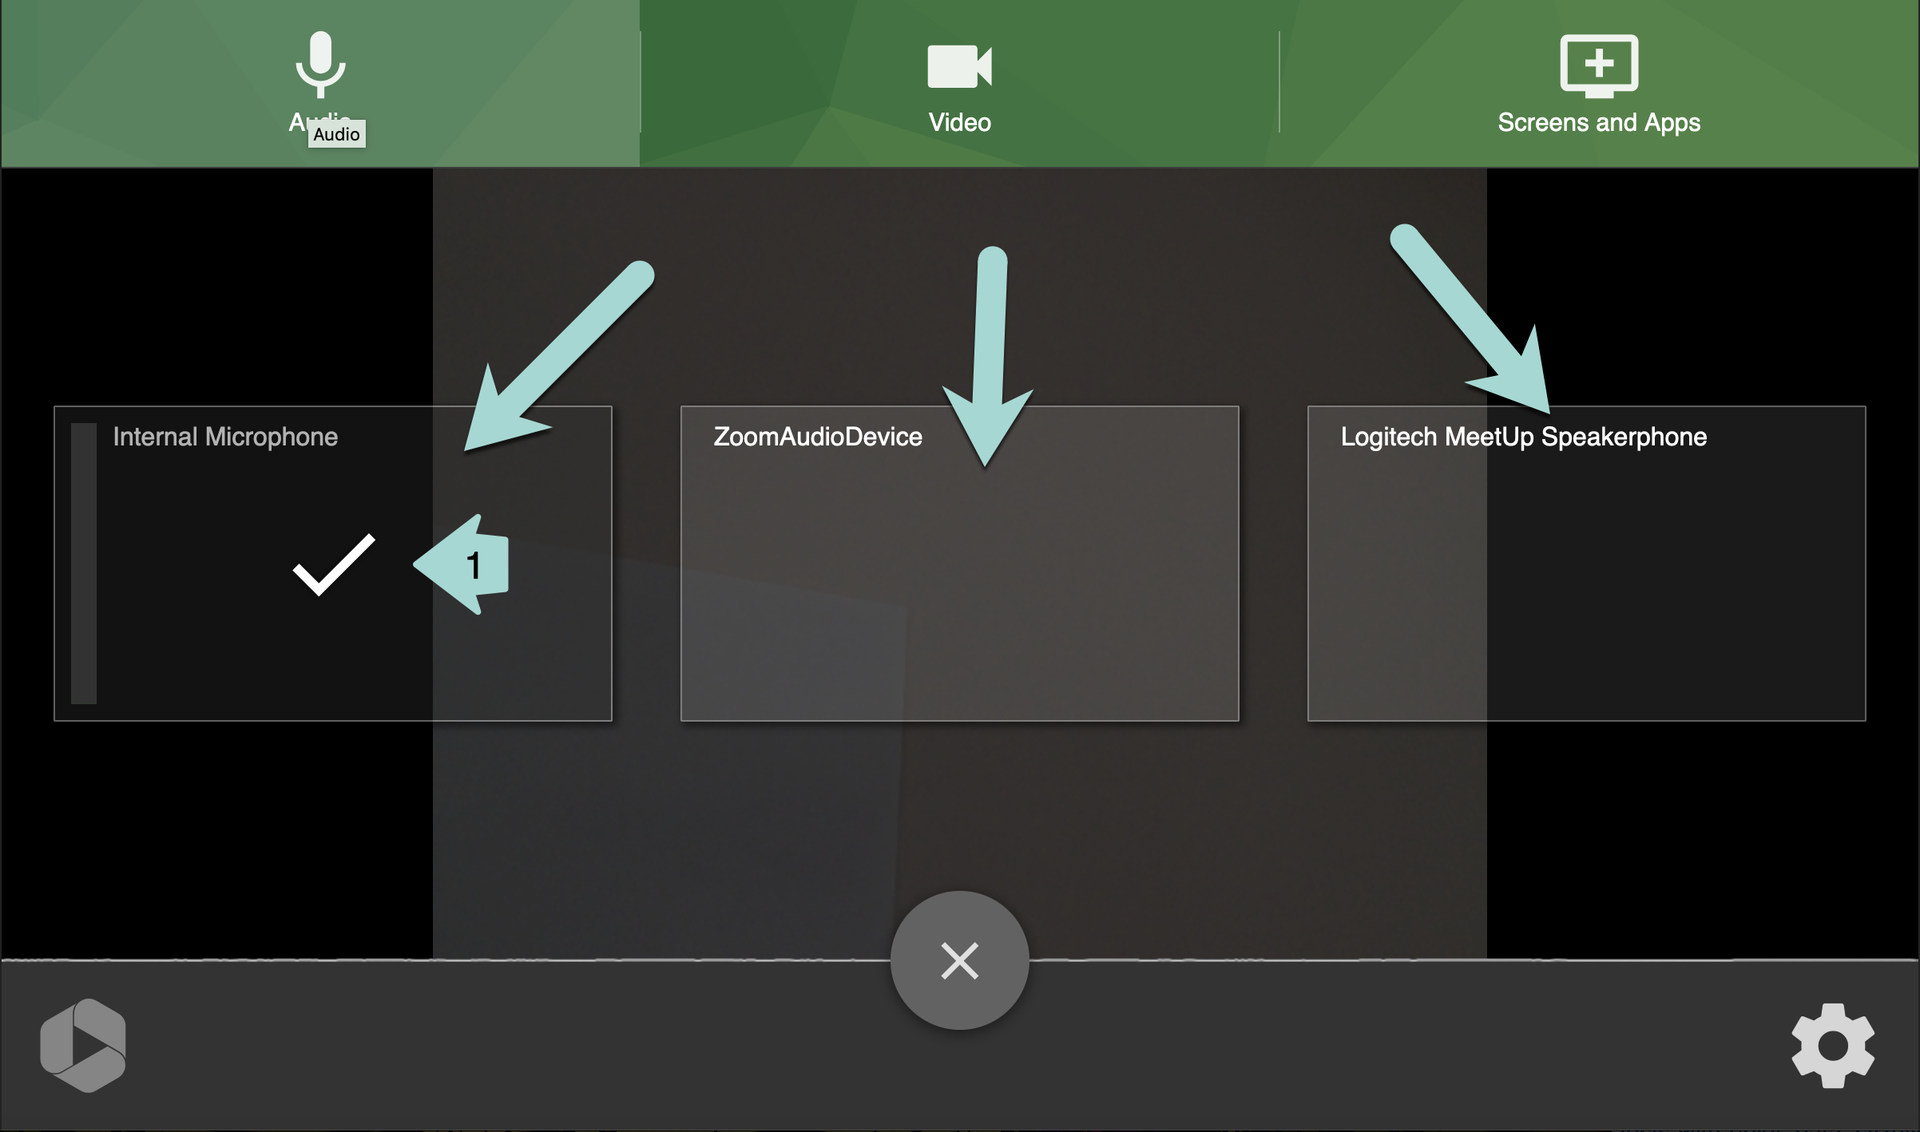
A. Selecting the Audio Source
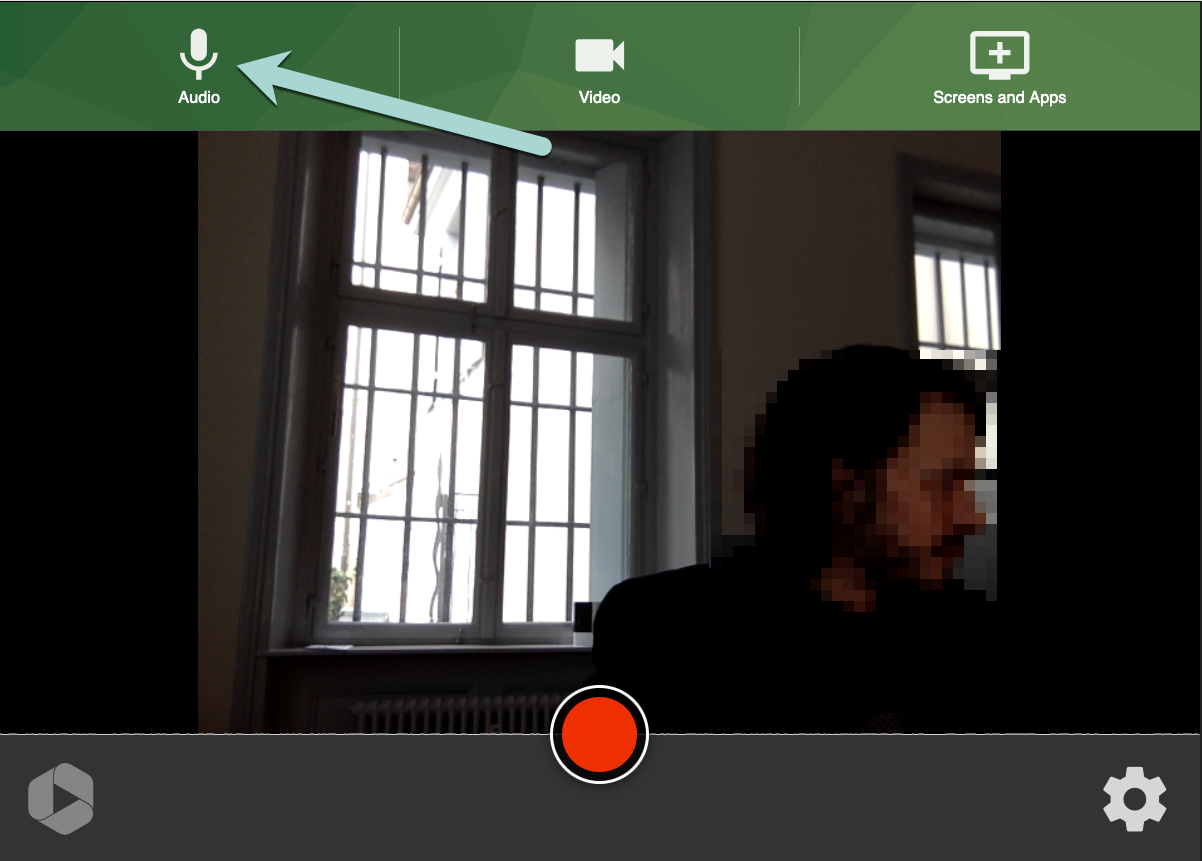
Click on the “Audio” button to select the audio source for your recording.
 The active audio source is marked with a tick (1). To change the audio source, simply click on the field with the audio source you want to use.
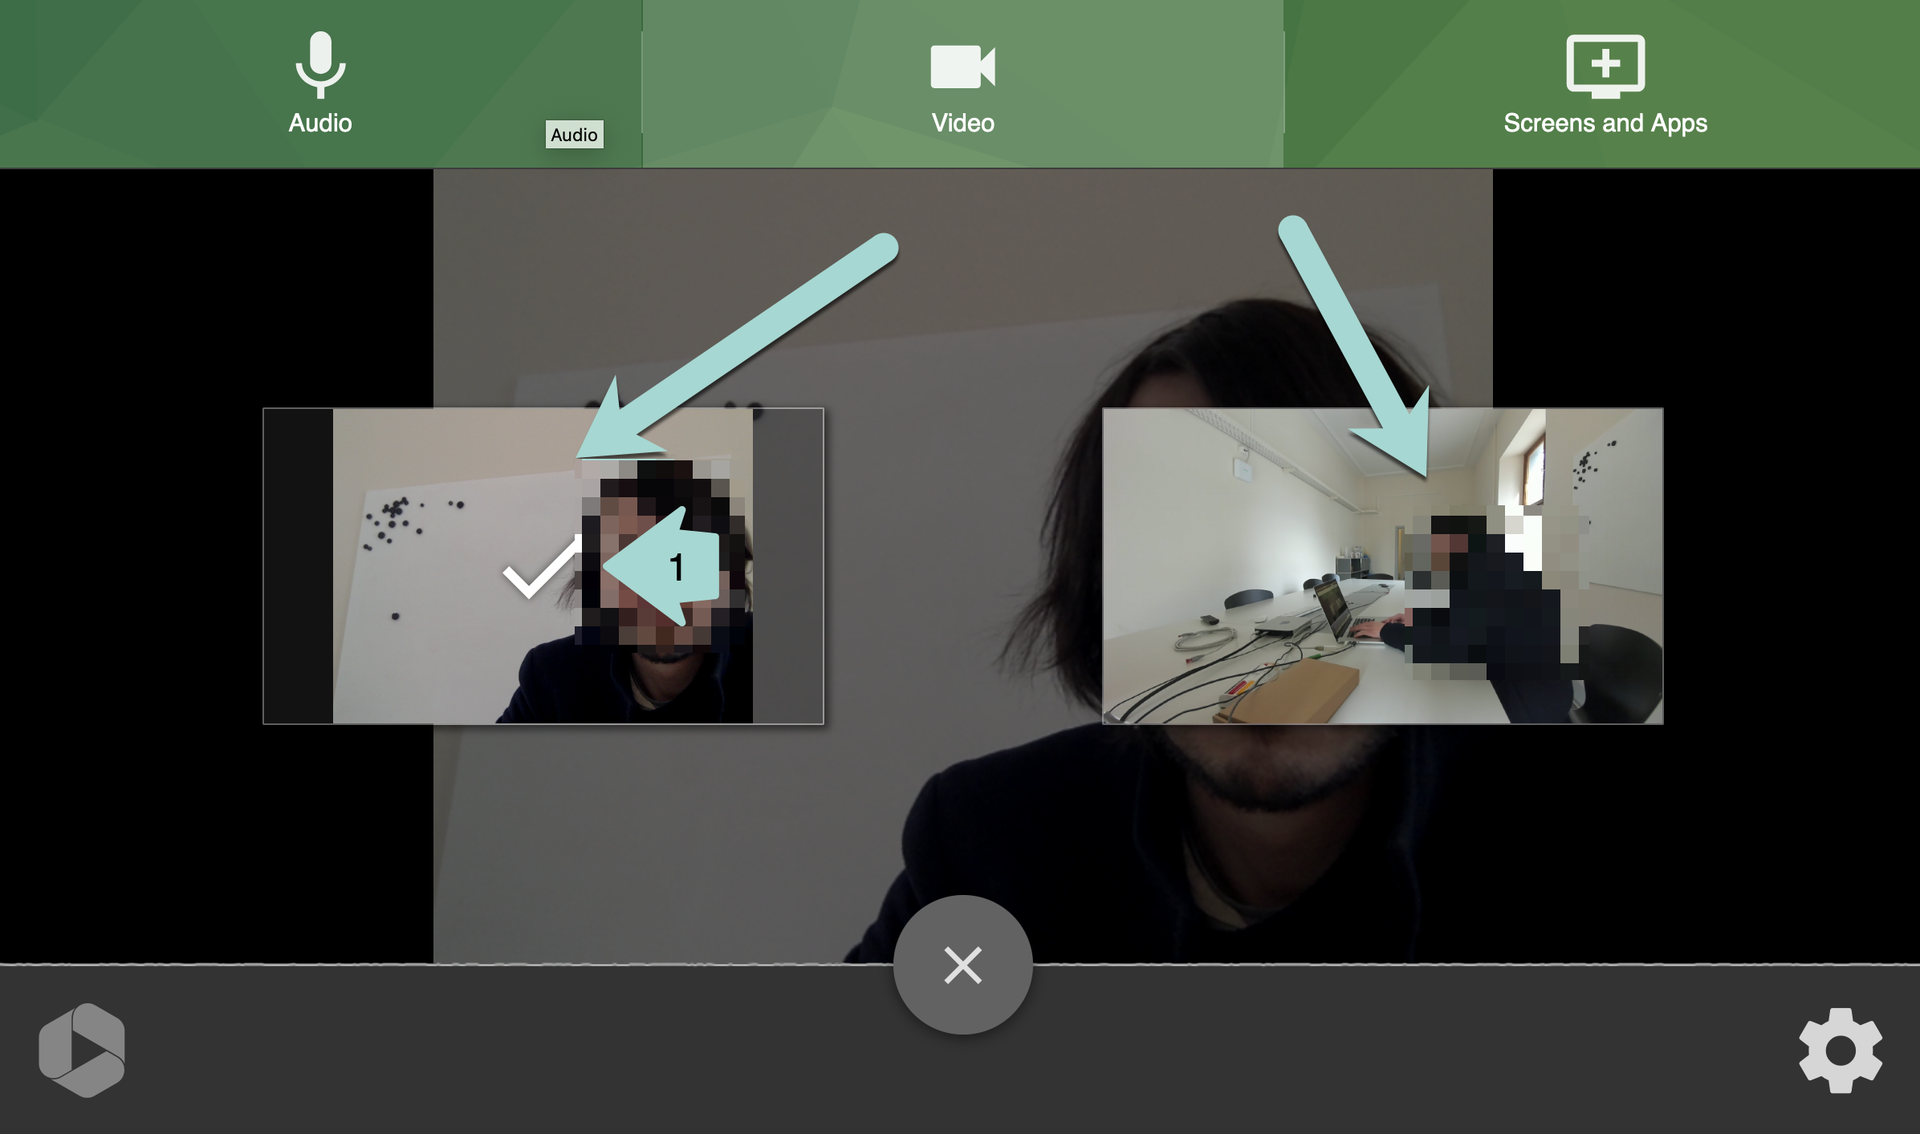
B. Selecting the Video Source(s)
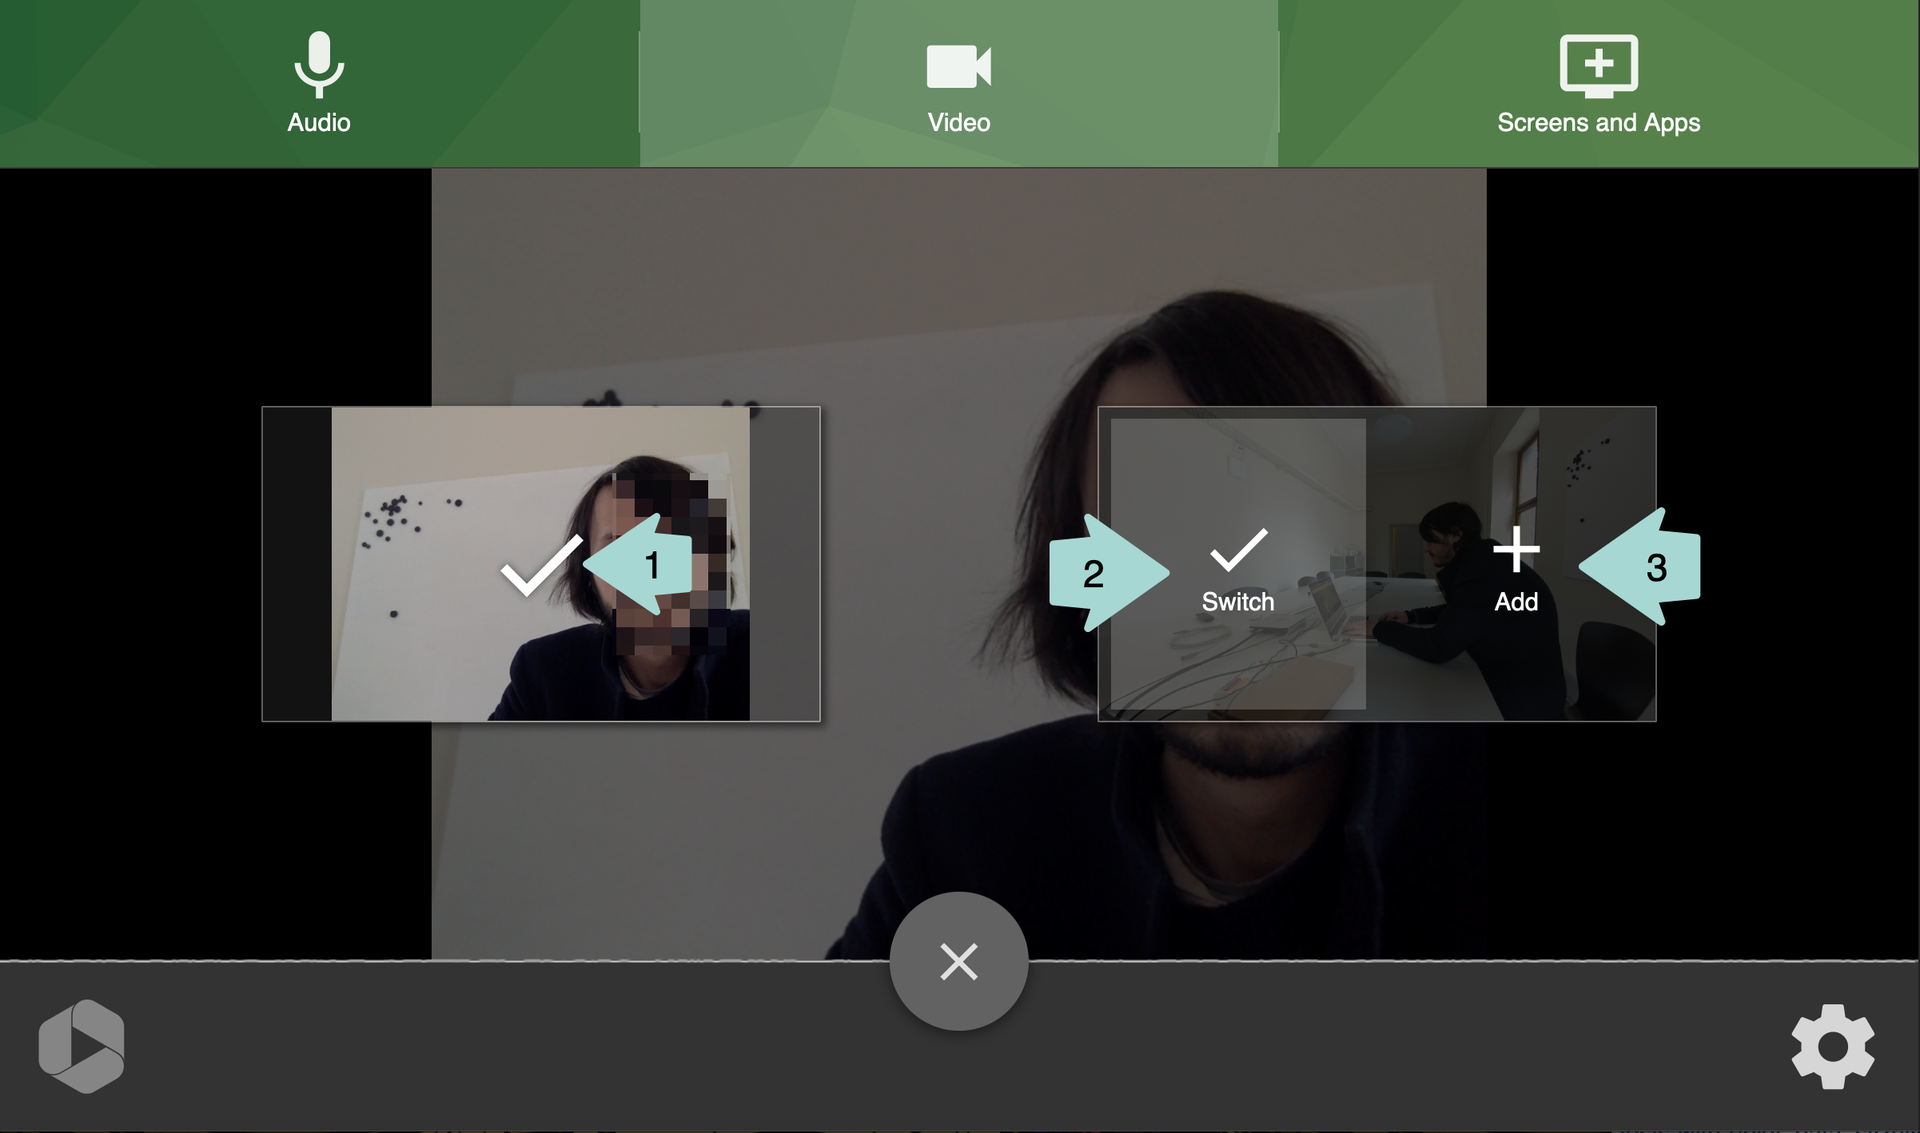
Using the “Video” button, you can select the camera you want to record with. You will immediately see what the picture looks like. Click on a camera to select it. Active cameras are marked with a tick (1).
 If several cameras are available, you can switch between them by selecting “Switch” (2). You can add another camera by clicking “Add” (3). This gives you the option of recording with multiple cameras.
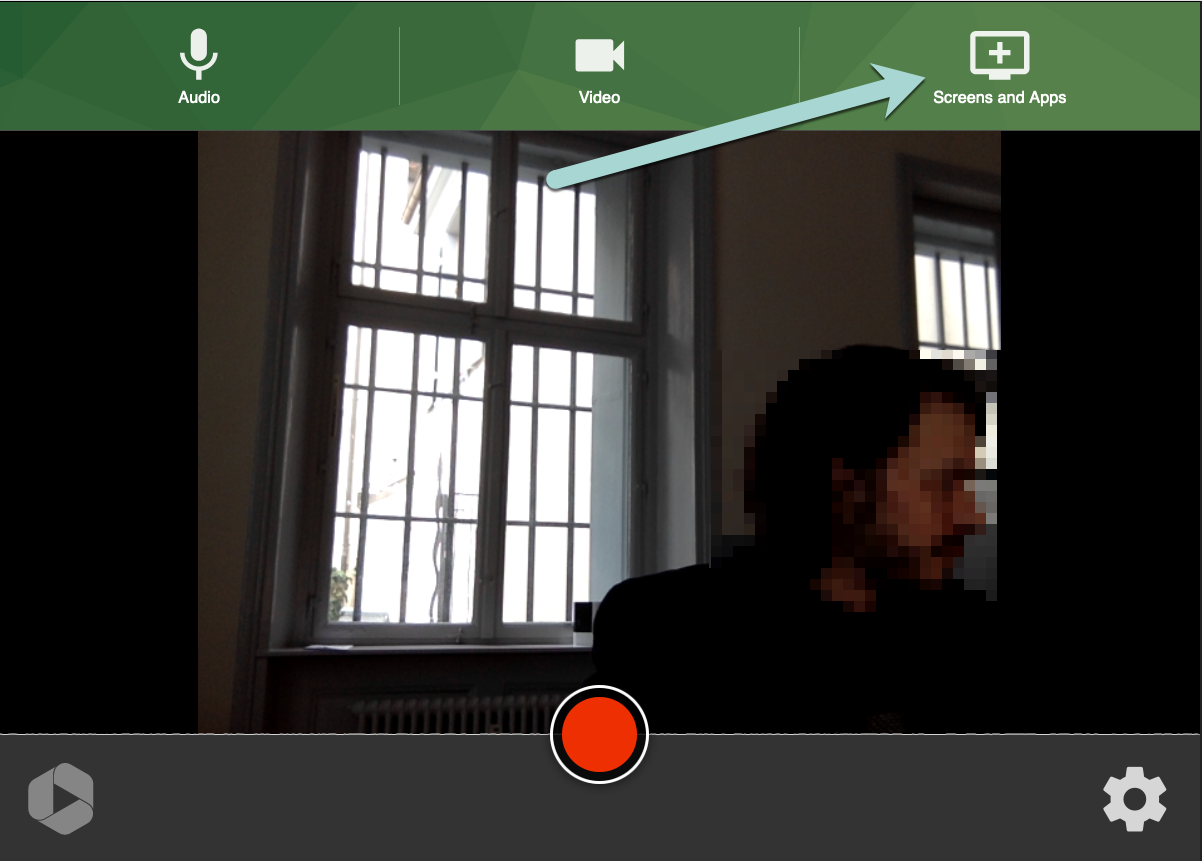
C. Secondary Sources / Screens and Apps:
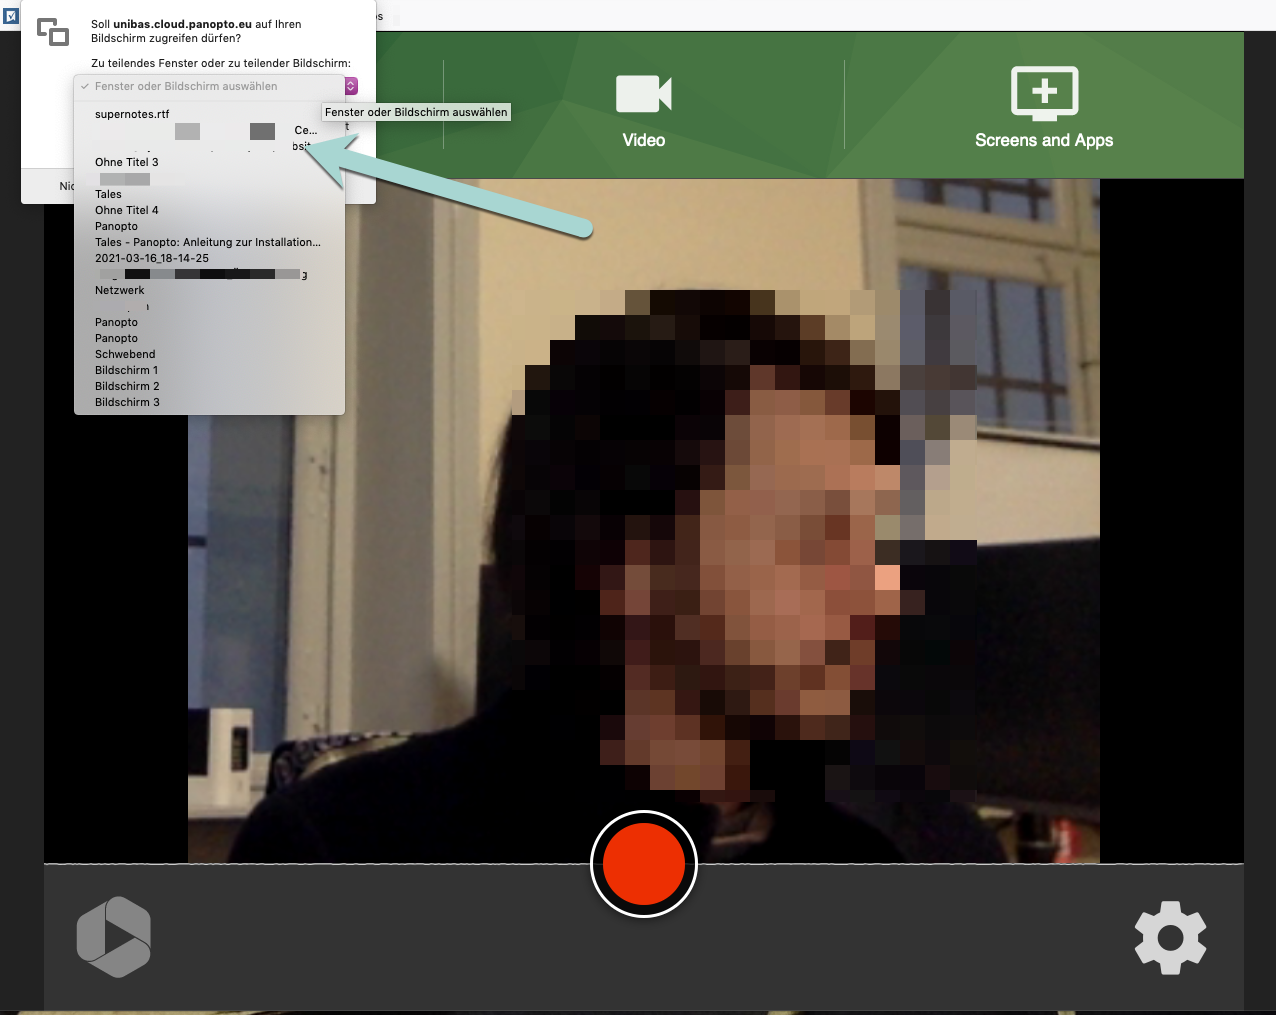
You can share your screen or individual programmes in your Panopto video via “Screens and Apps”. Click on “Screens and Apps” to do this.
 The view of the selection display may vary depending on your browser, i.e. Firefox / Chrome / Safari.
1. Screens and Apps in Chrome
In Chrome, the selection screen looks like the screenshot below. You can select what you want to share in your video via the buttons “Gesamter Bildschirm / Entire screen” (1), “Anwendungsfenster / Application Window” (2) and “Chrome-Tab” (3).
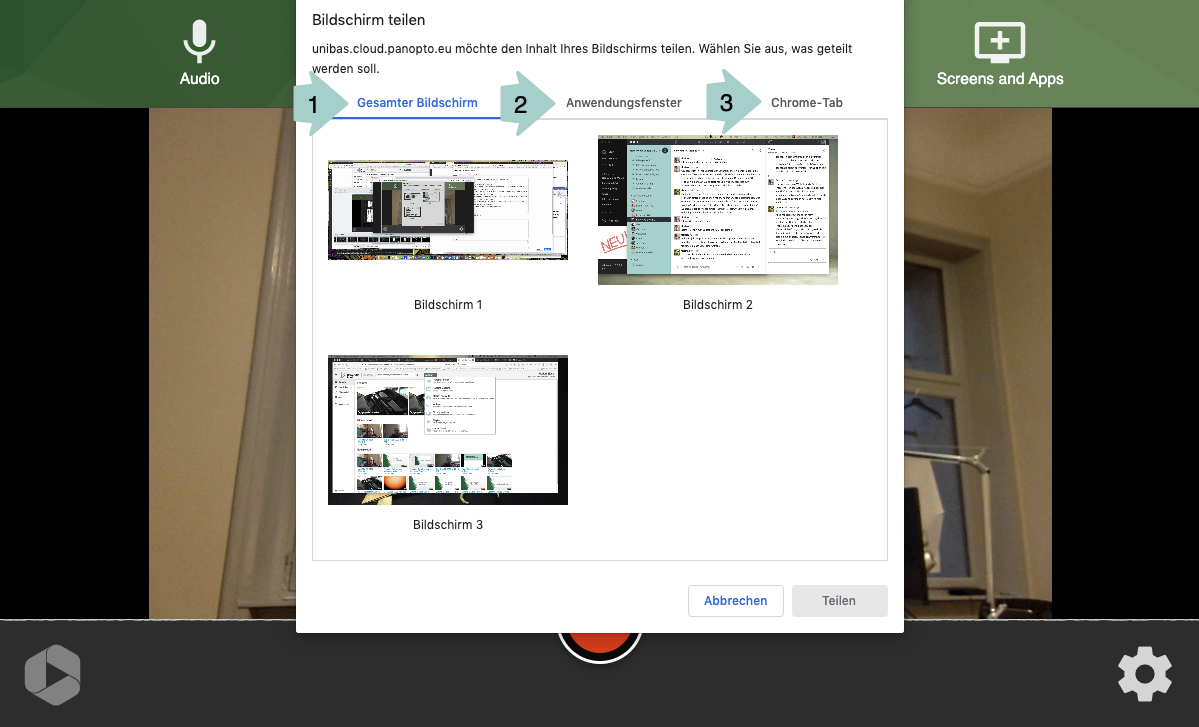 To share your whole screen, select the button “Gesamter Bildschirm / Entire screen” (1) and, in the overview of existing screens, click on the screen you want to share.
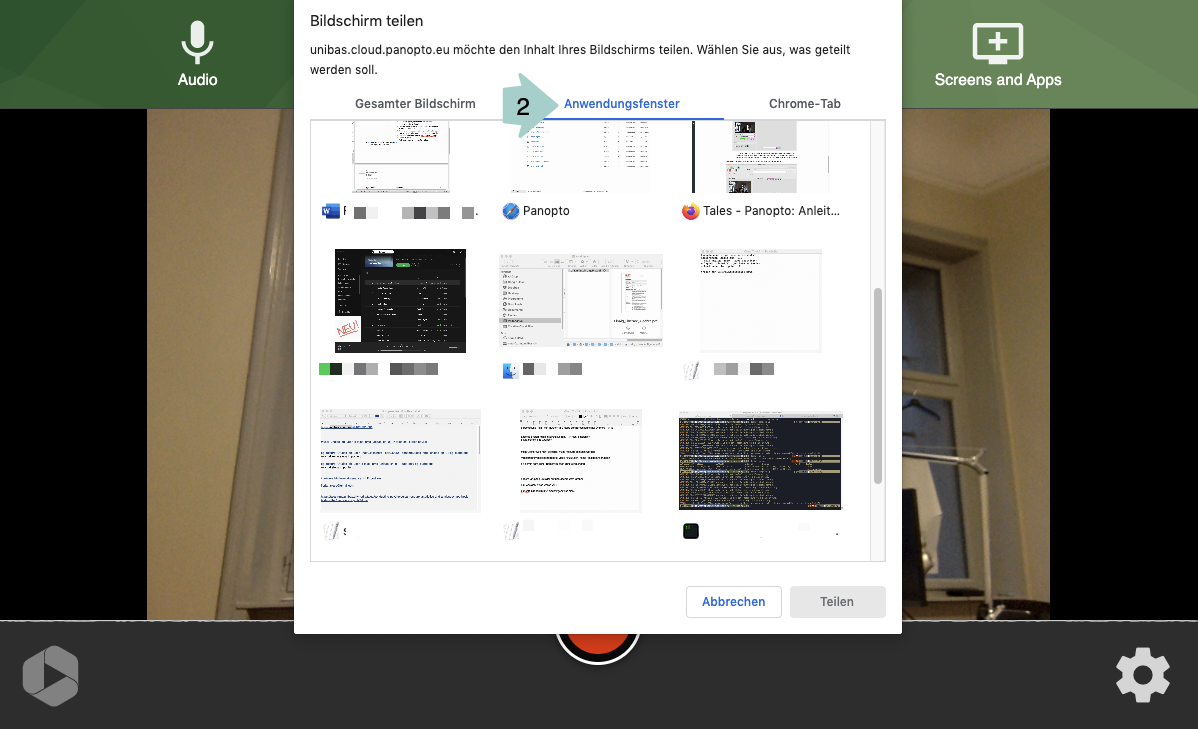
If you only want to share a specific window on your screen, select “Anwendungsfenster / Application Window” (2). A list of all application windows that you can share will now appear. You can share the relevant application window in your video by clicking on it.
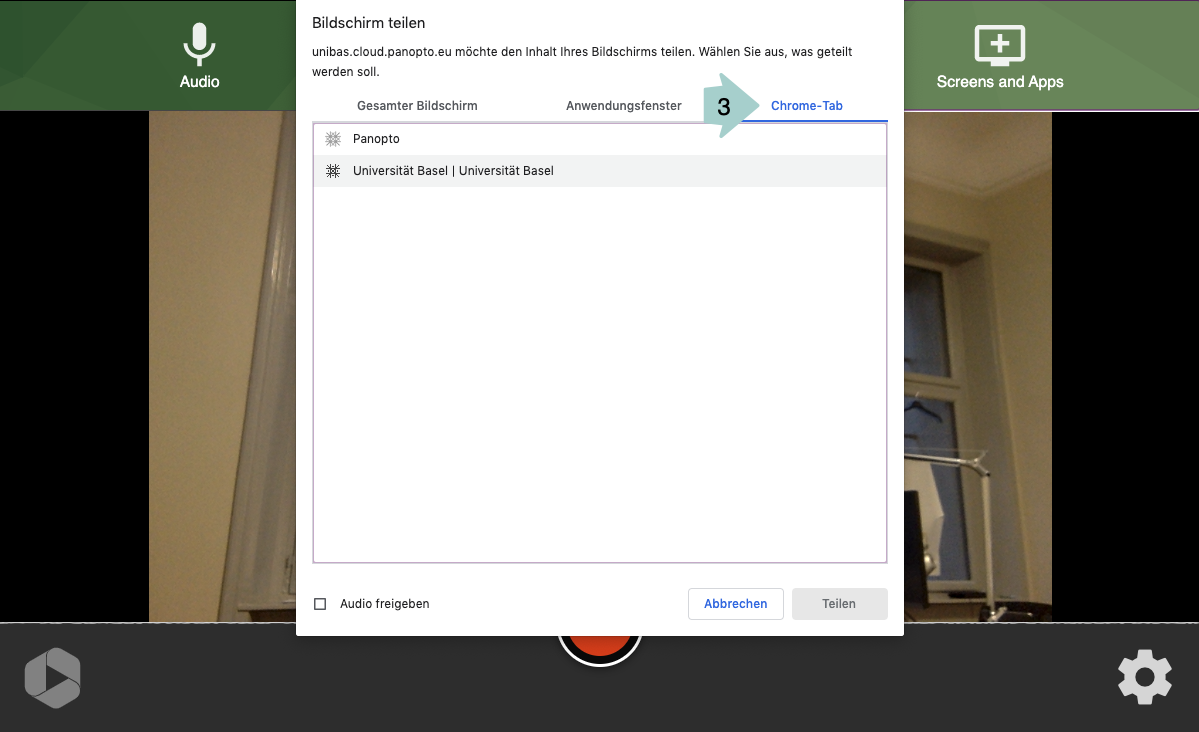
You can also share individual tabs that are open in your Chrome browser. To do this, first select the “Chrome-Tab” button and a list will appear; then select the relevant tab in the list.
2. Screens and Apps in Firefox
In Firefox, after selecting “Screens and Apps”, a window with a drop-down menu will appear. In the drop-down menu, select the application that you want to include in your video.
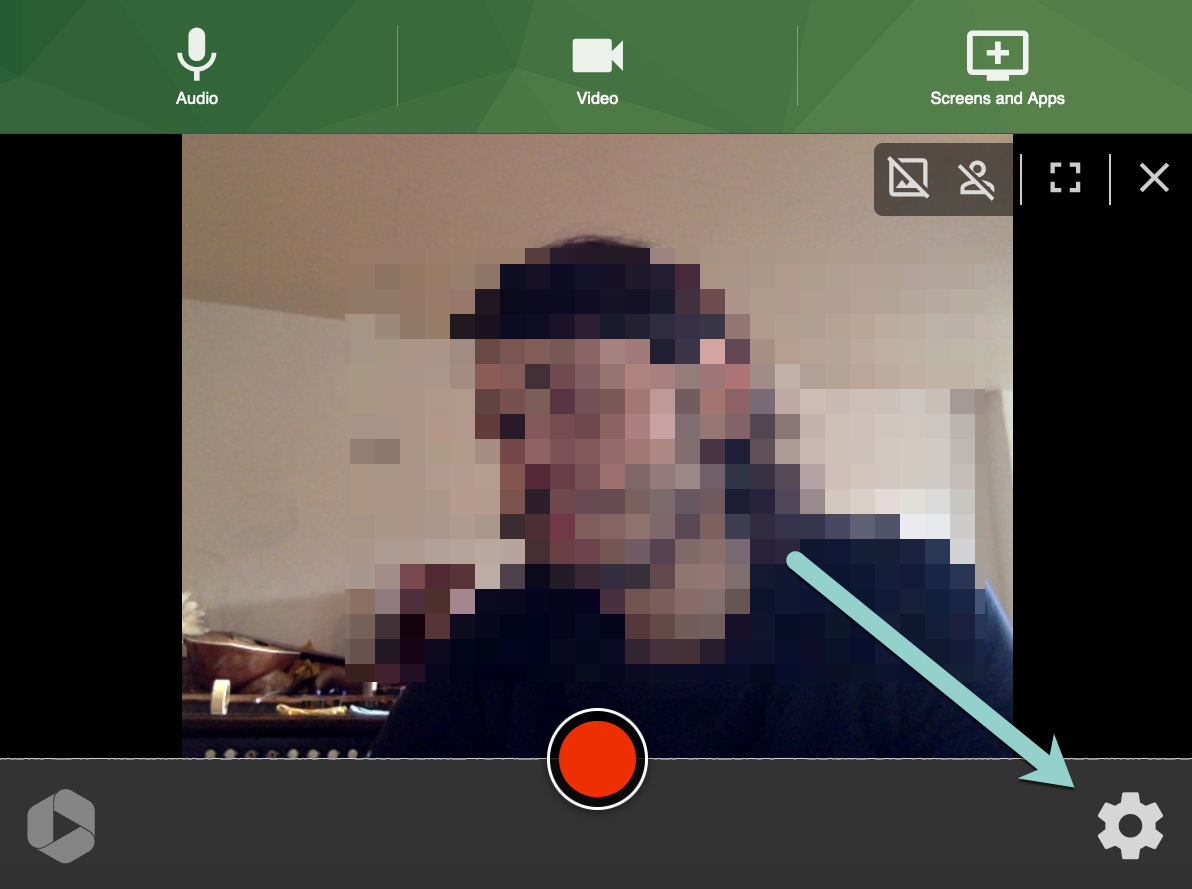
D. Additional Settings:
If you click on the gear icon at the bottom right of the Panopto Capture page, you can choose additional video settings. These are briefly explained below.
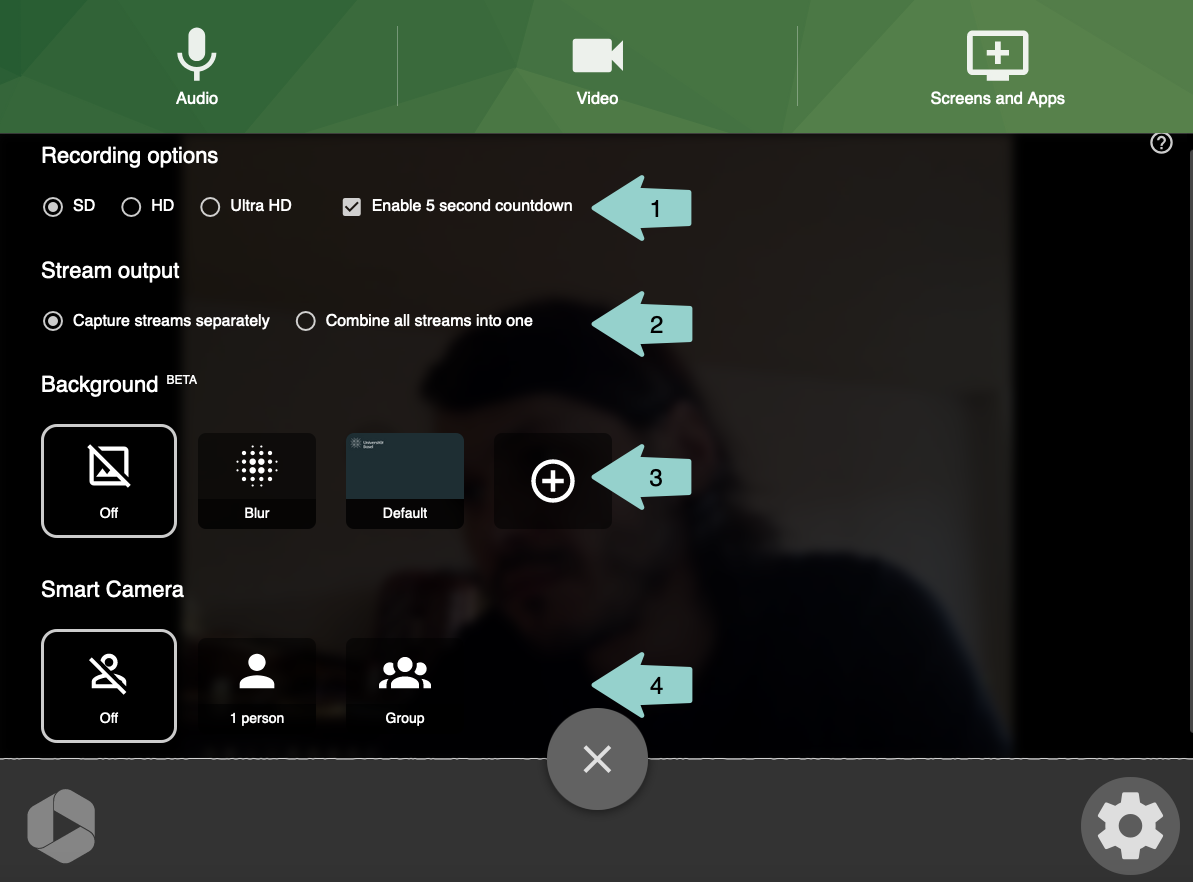
1. Recording Options – Video Quality (1)
- Here you can choose whether you want to record your video in SD (640x480) or HD (1280x720).
- By checking and unchecking the box “Enable 5 second countdown”, you can choose whether to start the recording immediately or with a five-second delay after clicking the record button.
2. Stream Output – Output of a Video with Multiple Video Input Sources (2)
- If you are using several cameras or sharing a screen or application window in addition to your video camera, you can choose whether the individual video sources should be saved as separate video files (“Capture streams separately”) or as a single video file (“Combine all streams into one”).
3. Background (3)
This allows you to add a digital background to your camera image. The standard options are “Blur” (blurred background) and “Default” (Basel University logo on a grey background). You can also choose your own background by adding it with the “+” symbol.
4. Smart Camera (4)
Smart Camera is a feature that centres the camera on your face and moves with you when you move (as long as you are in the camera’s field of vision).
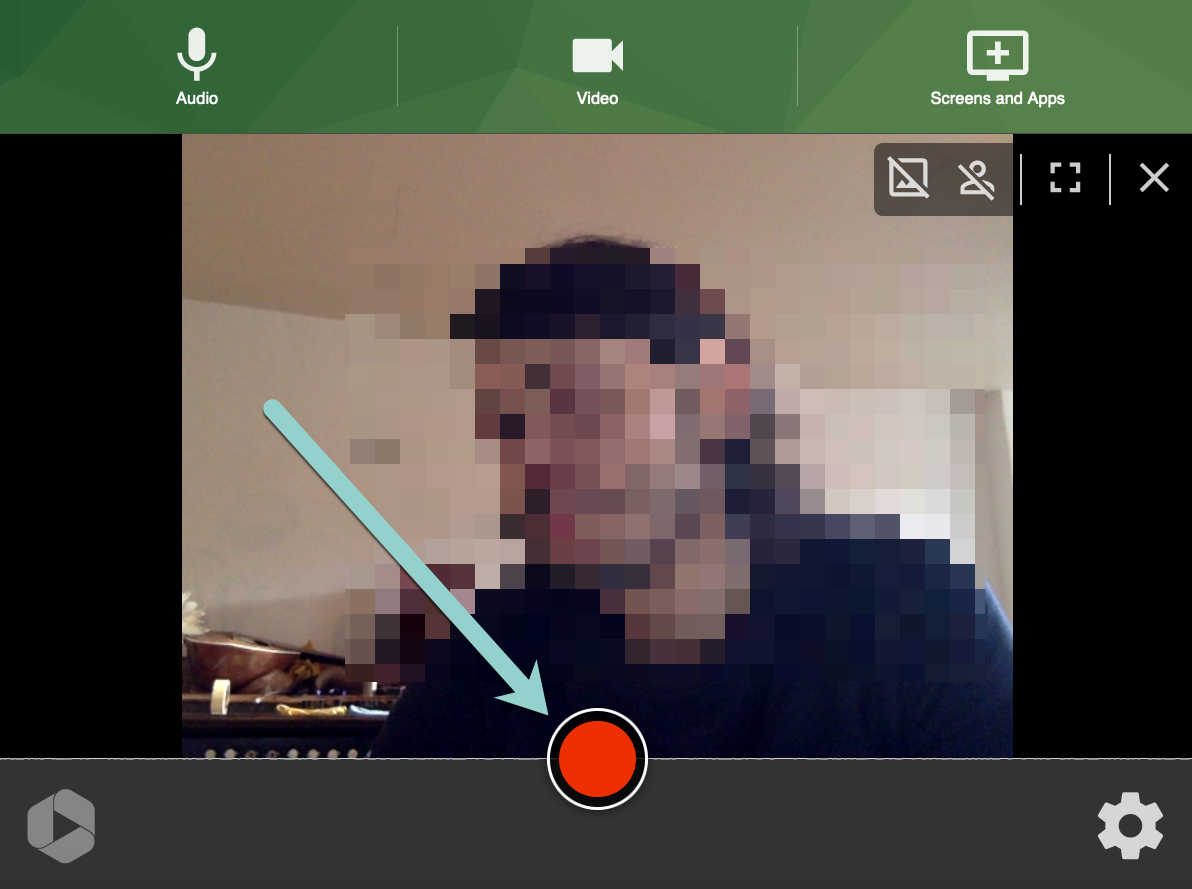
E. Start recording
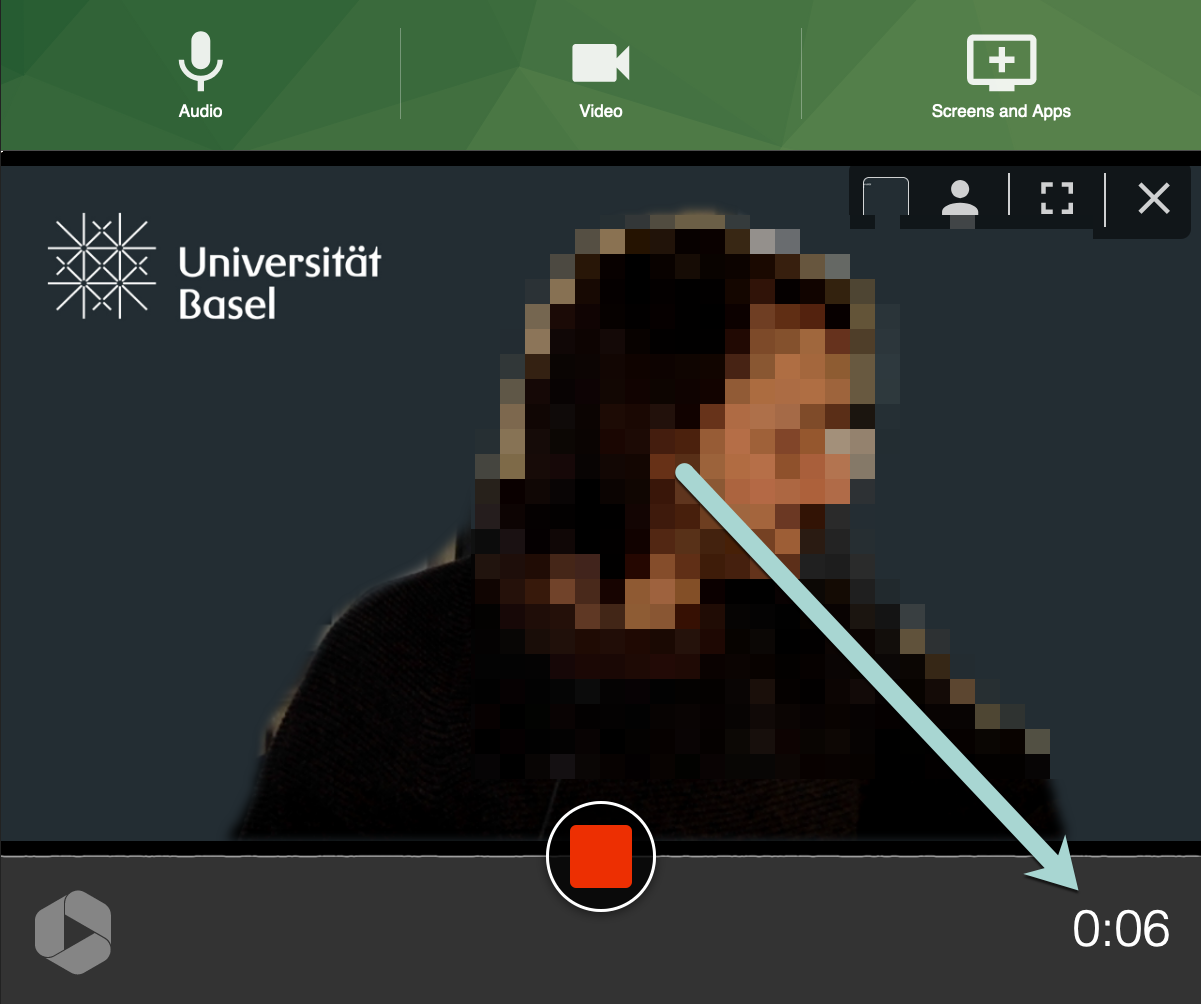
To start recording, click on the big red recording button.
 While recording is in progress, you will see the elapsed time of your current recording in the bottom right-hand corner. The red recording button will turn into a red stop symbol.
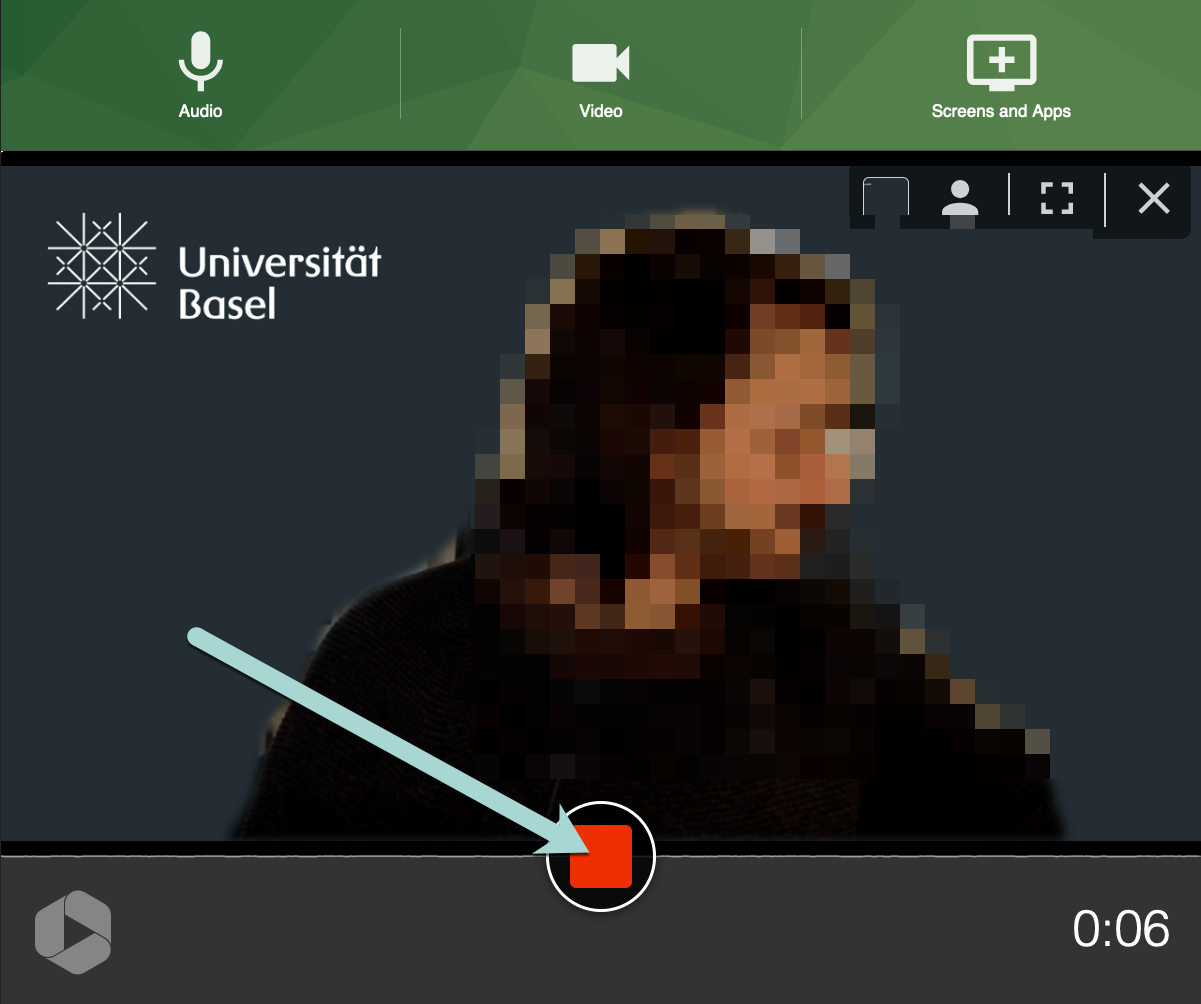
F. Stop recording
Once you have finished recording, click on the stop button.
 Once you have clicked on the stop button, the video will automatically be uploaded to the Panopto page and you will switch to the following view:
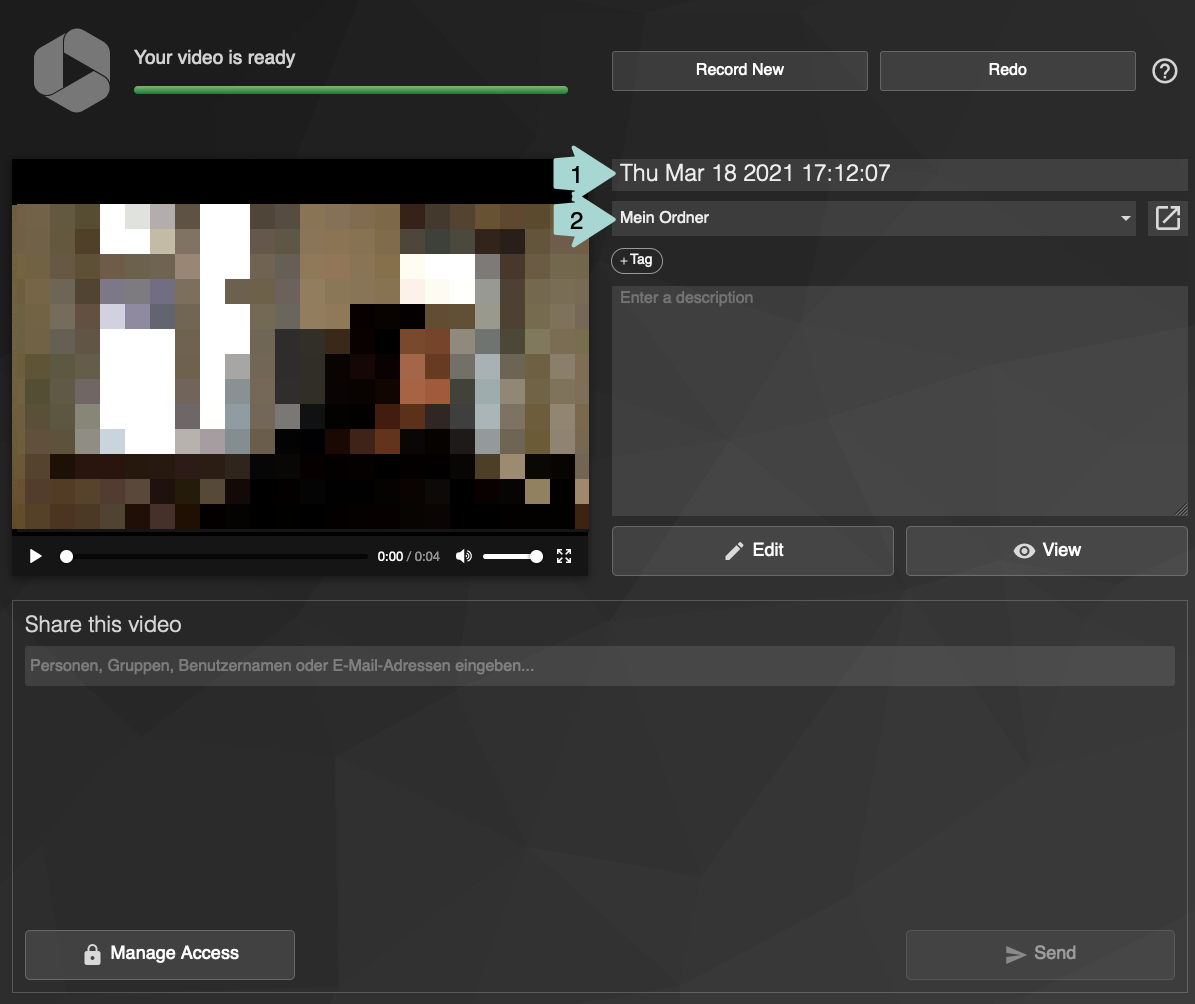
You can give your video a title in the box at the top (1). (2) shows the storage location of the video. If you want to store the video in a different location, click on the drop-down menu and select the relevant location.