USING WEBEX: BROWSER VERSION
2.3
Schedule a meeting
In the following we will explain how to schedule a meeting in order to be able to hold a session with all participants.
Schedule a meeting
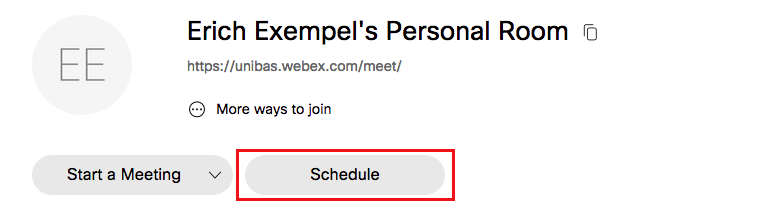
- Go to your personal room. Go to “Home” and then click on “Schedule”. Or go to “Meetings” > “Schedule”.
- For Meeting type select “Webex Meetings Pro Meeting”, for meeting templates in the top right corner you can set the default version. Now you can give your meeting a title (Meeting topic). The Meeting password will be set automatically – but you can also set your own. Please note that meeting participants need this password to join the meeting – so do not choose a password that is sensitive or important to you. Finally, you can decide who can attend the meeting. Enter the email addresses of the attendees in this field. Don’t worry: even after the meeting has been scheduled, attendees can still be added or removed.
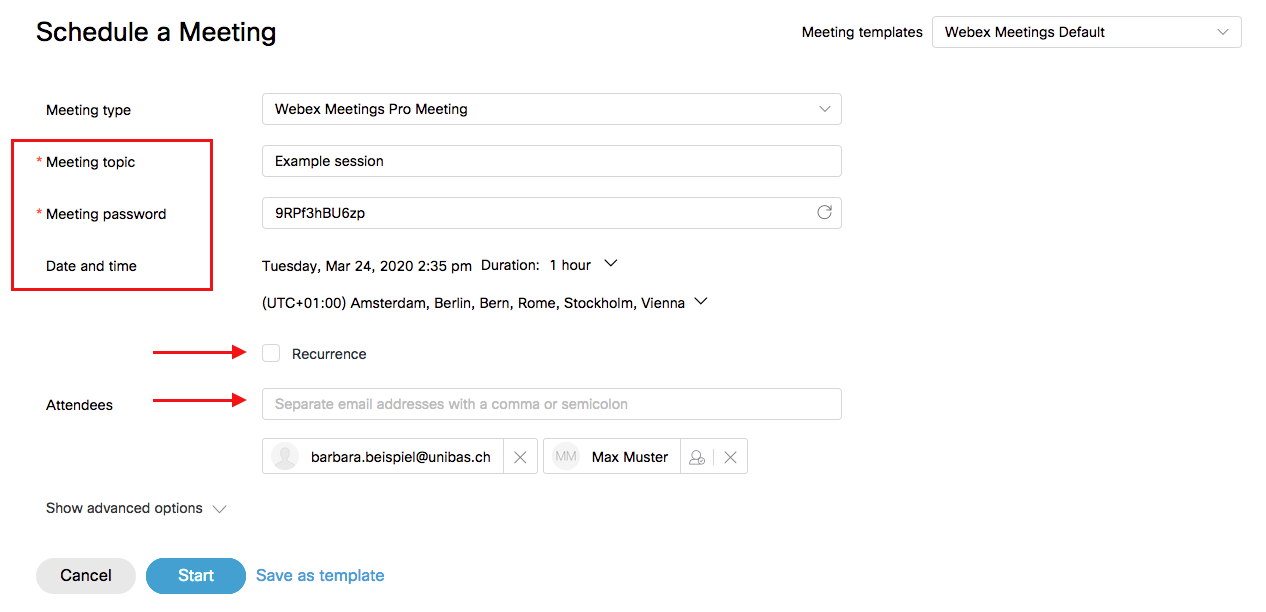
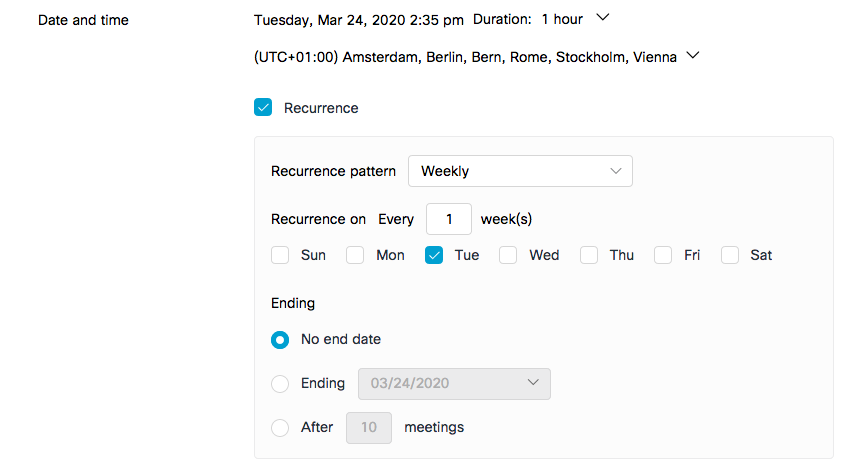
- Select date and time for the meeting. At this point, you can also choose whether the meeting is a one-time or recurring meeting (for example, a daily or weekly meeting). You can specify the duration, the recurrence pattern, the weekday, the recurrence frequency and the end date.
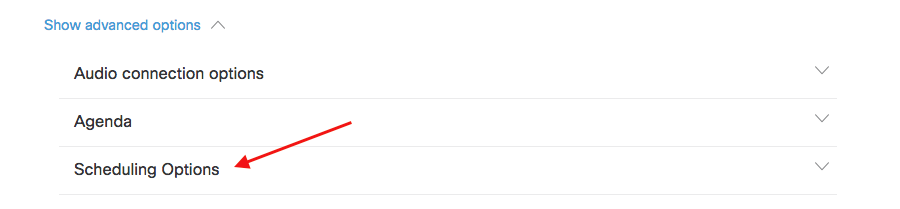
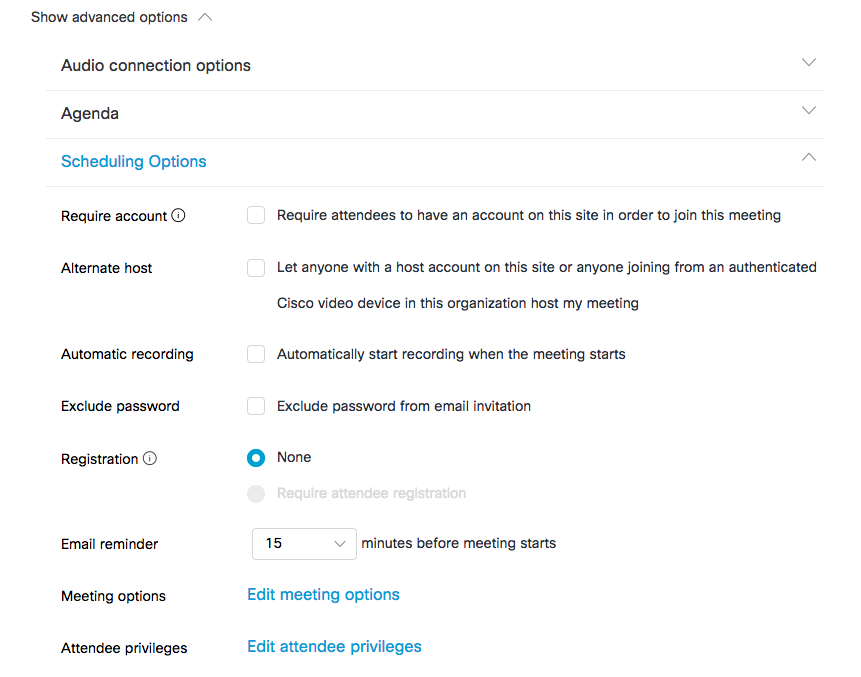
- Under “Show advanced options” you can make further settings for your meeting. Pay particular attention to the “Schedule options”.
- Here you can select and deselect more options:
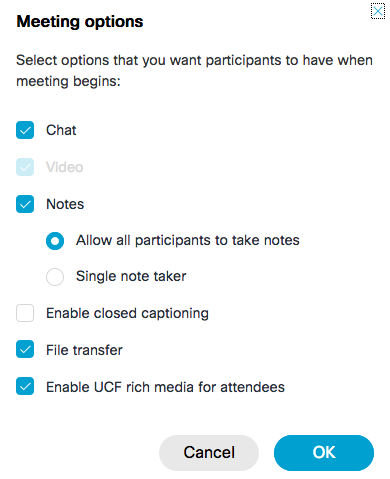
- With “Meeting options” you can allow attendees to chat, take notes, transfer data or share UCF Rich Media (UCF Rich Media is a file format that can be used to share all types of documents, including PowerPoint or Excel files). If you do not wish to hold a purely oral session, we recommend that you select all items. However, this is of course up to you. Click on “OK”.
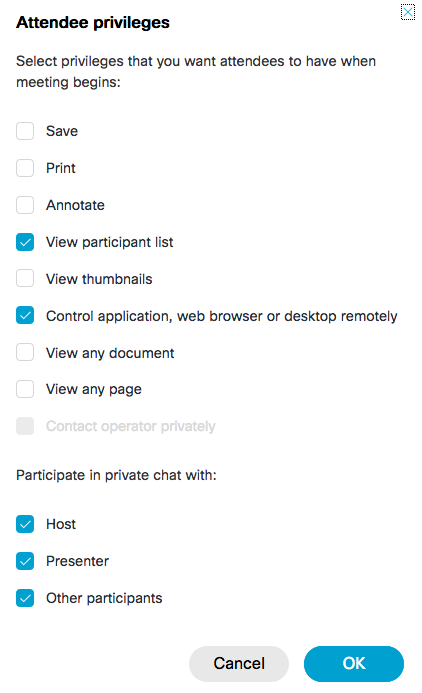
- With “Attendee privileges” you can determine what your colleagues should be able to do or what should be displayed to them during the session. However, consider whether it makes sense for your session that employees can comment on the meeting or have a private chat with you as host and moderator or with each other. Select the options on or off accordingly. Click on “OK”.
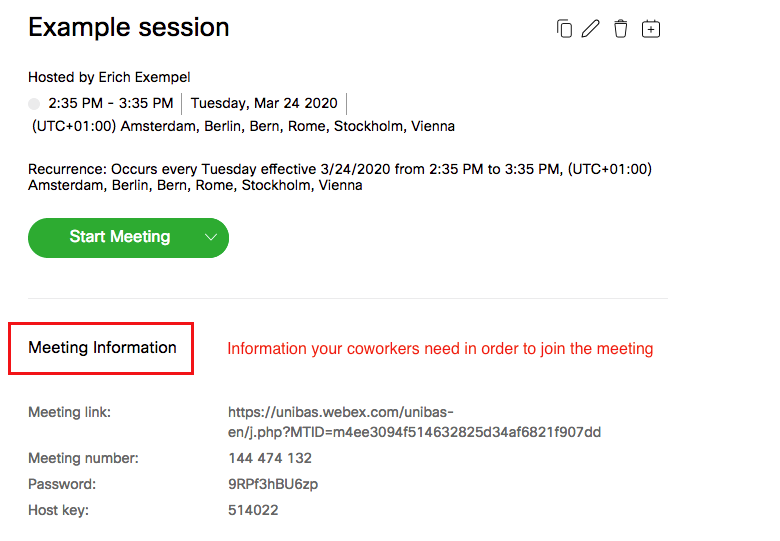
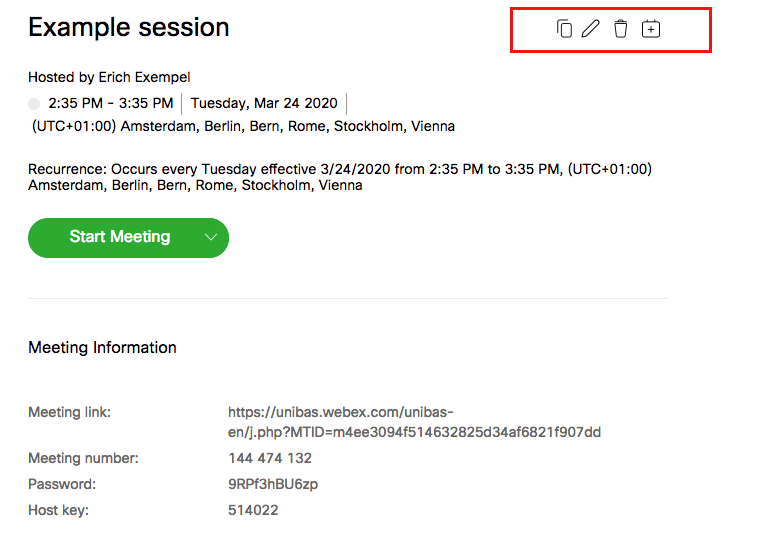
- Finish your meeting with a click on “Schedule” (if your meeting already starts in the next few minutes, you will see “Start” instead of this button). Your meeting has now been created. Under “Meetings” (on the left side) you can see all your scheduled meetings. It is especially important that everyone attending your meeting receives the “Meeting Information”. Make sure that you provide all attendees with the meeting link, the meeting ID, the password and your host ID. This is the only way they can log in to the meeting.
- At the top right you can duplicate, edit, cancel or add the meeting to your calendar.
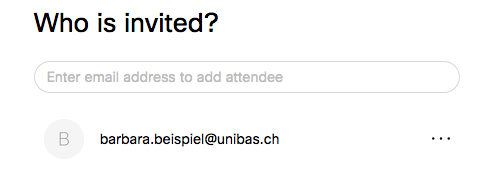
- On the right side you can add or remove attendees even after the meeting has been created.
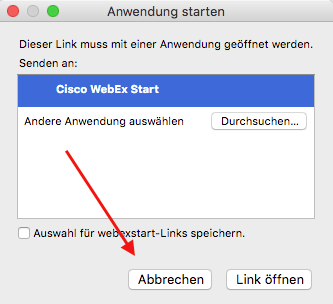
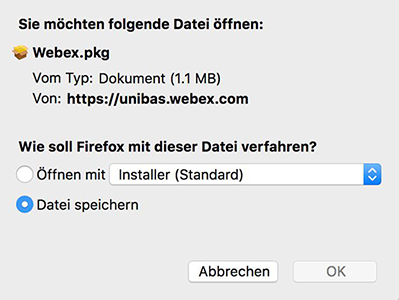
- When the time of your meeting has come, start your meeting by clicking “Start” under “Meetings” for the corresponding meeting (see next chapter). You may now be asked to download the desktop app. If you want to use the web app, click on cancel and select “Join from your browser”.

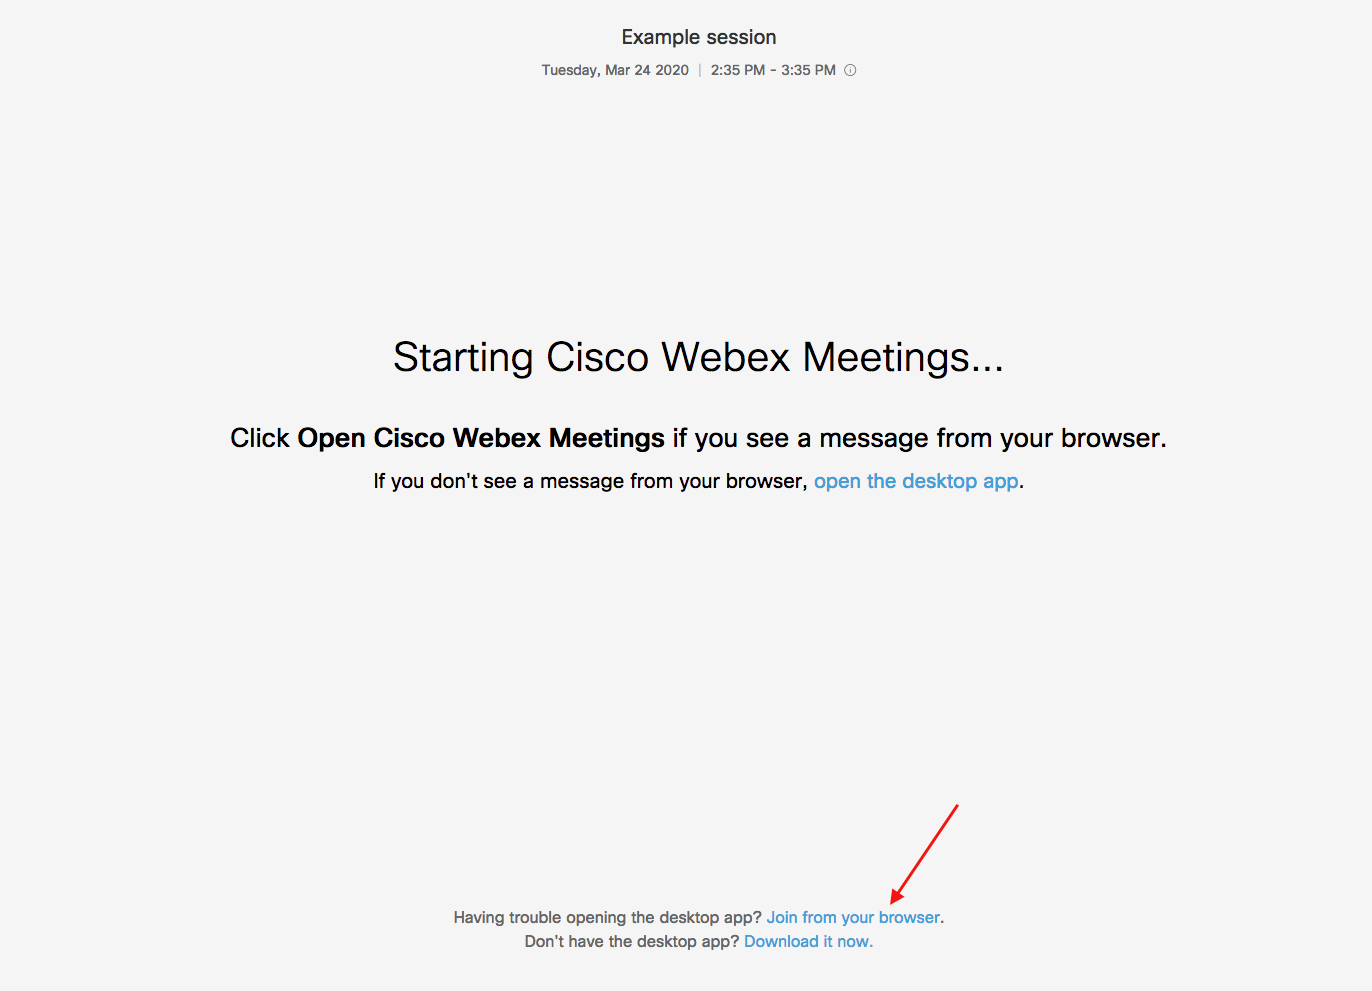
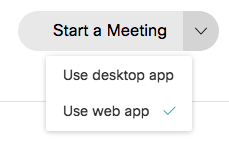
- Alternatively, you can go to the detailed view of the meeting and click on the triangle next to “Start meeting” and select “use web app”.
License
University of Basel