RECORDING
3.6
Sharing a live Webcast of a lecture
Webcast in application
If you would like to share a live Webcast of your lecture, select the Webcast checkbox before you start the recording.

To start the broadcast, click the Record button. A link to your Webcast is generated after your broadcast starts. You can share this link with your viewers.
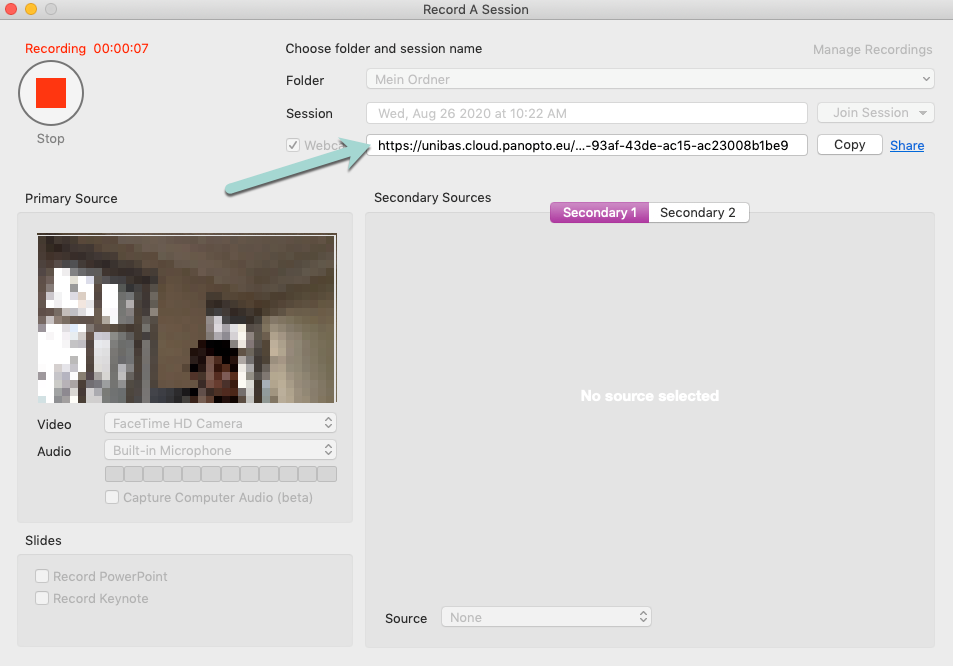
Please note: there is approximately a 40-second delay between what the presenter is showing and what the viewer sees.
Webcast in Browser
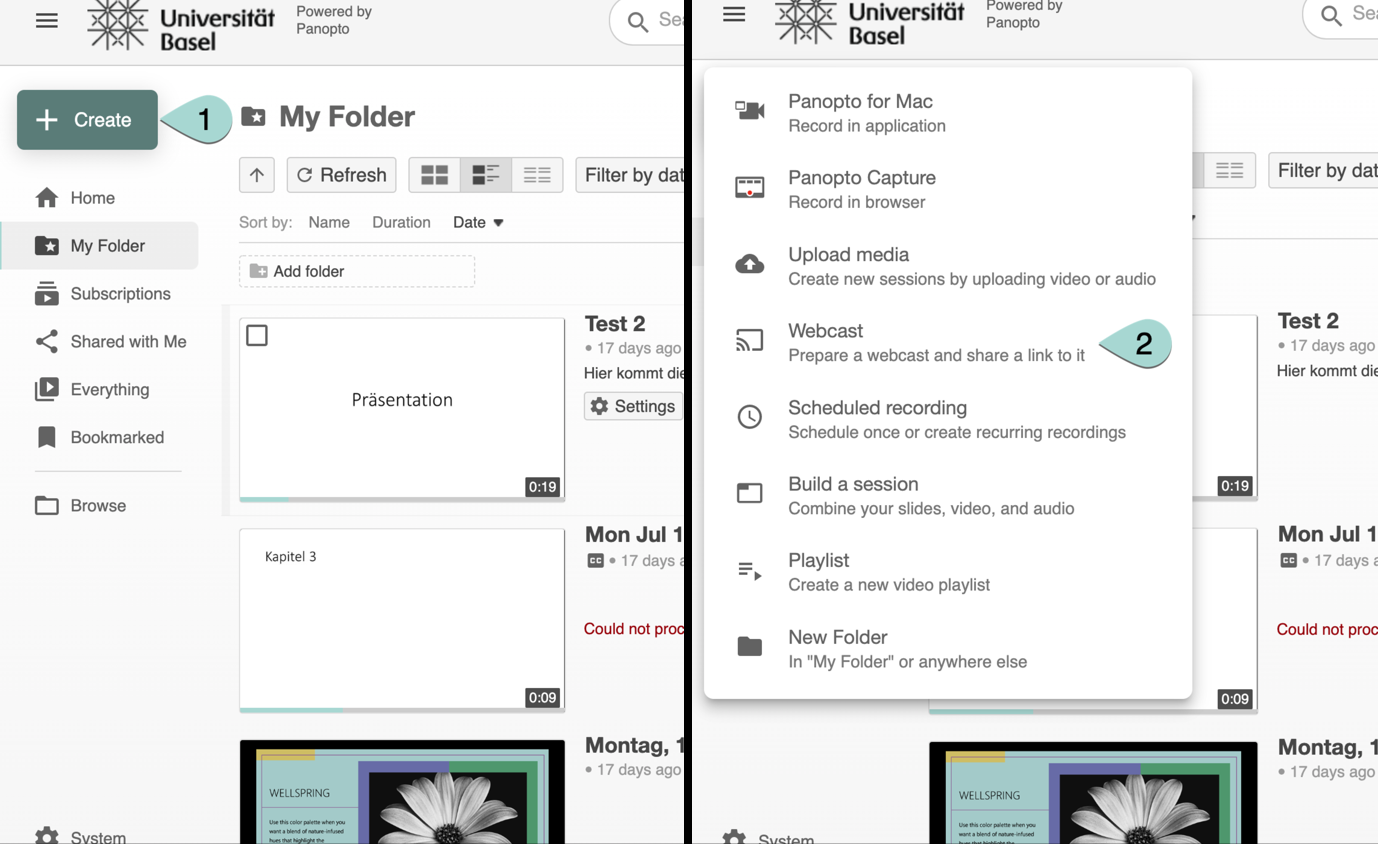
You can also prepare a webcast in your browser. To start, click on the Create button (1) and choose Webcast in the drop-down menu that appears (2).
This will open the window below:
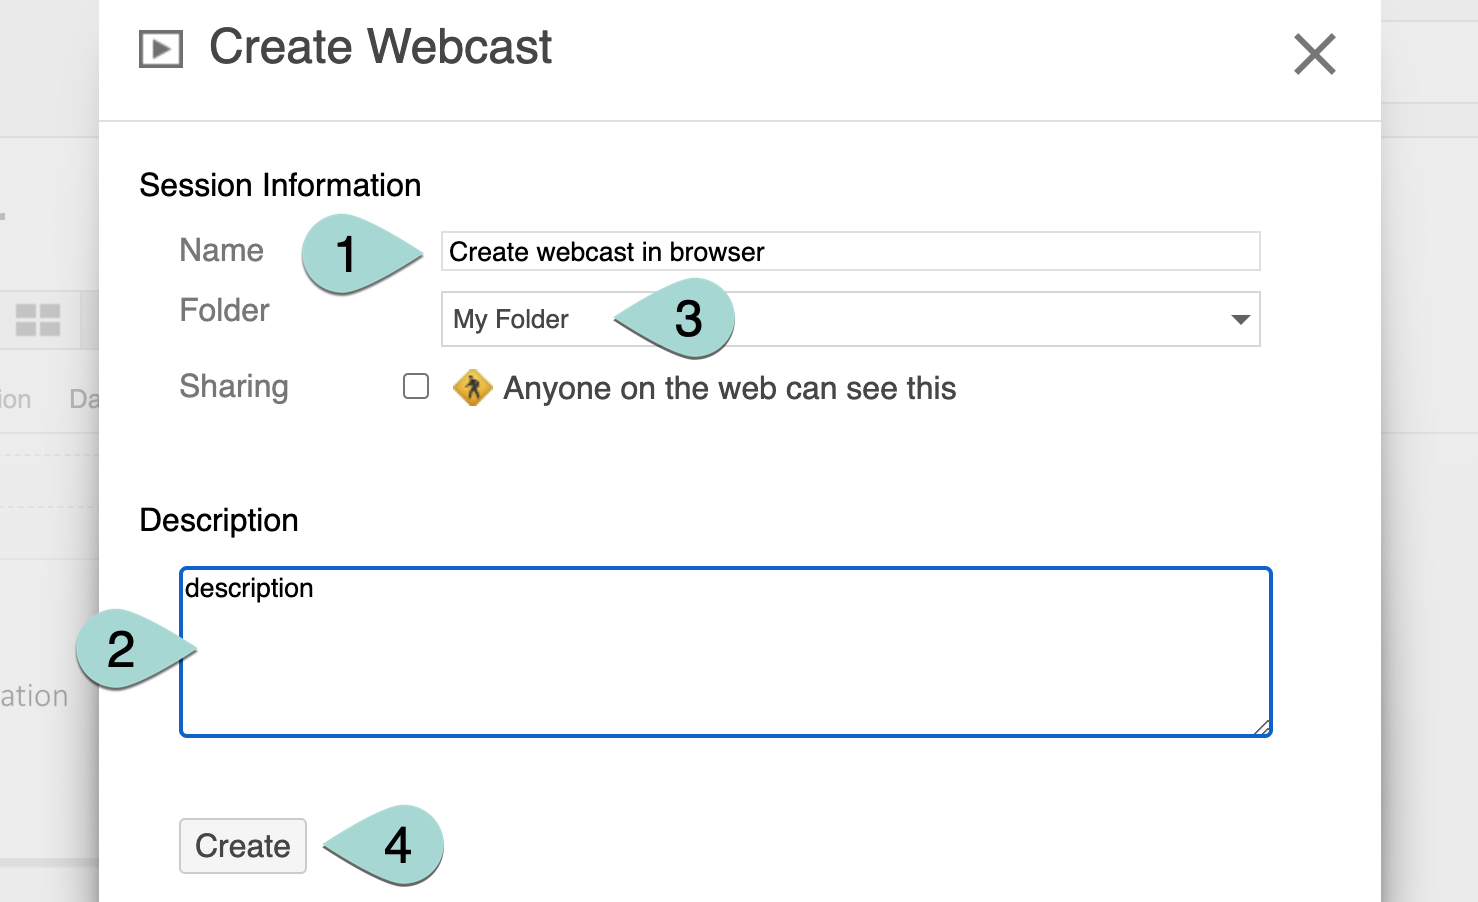
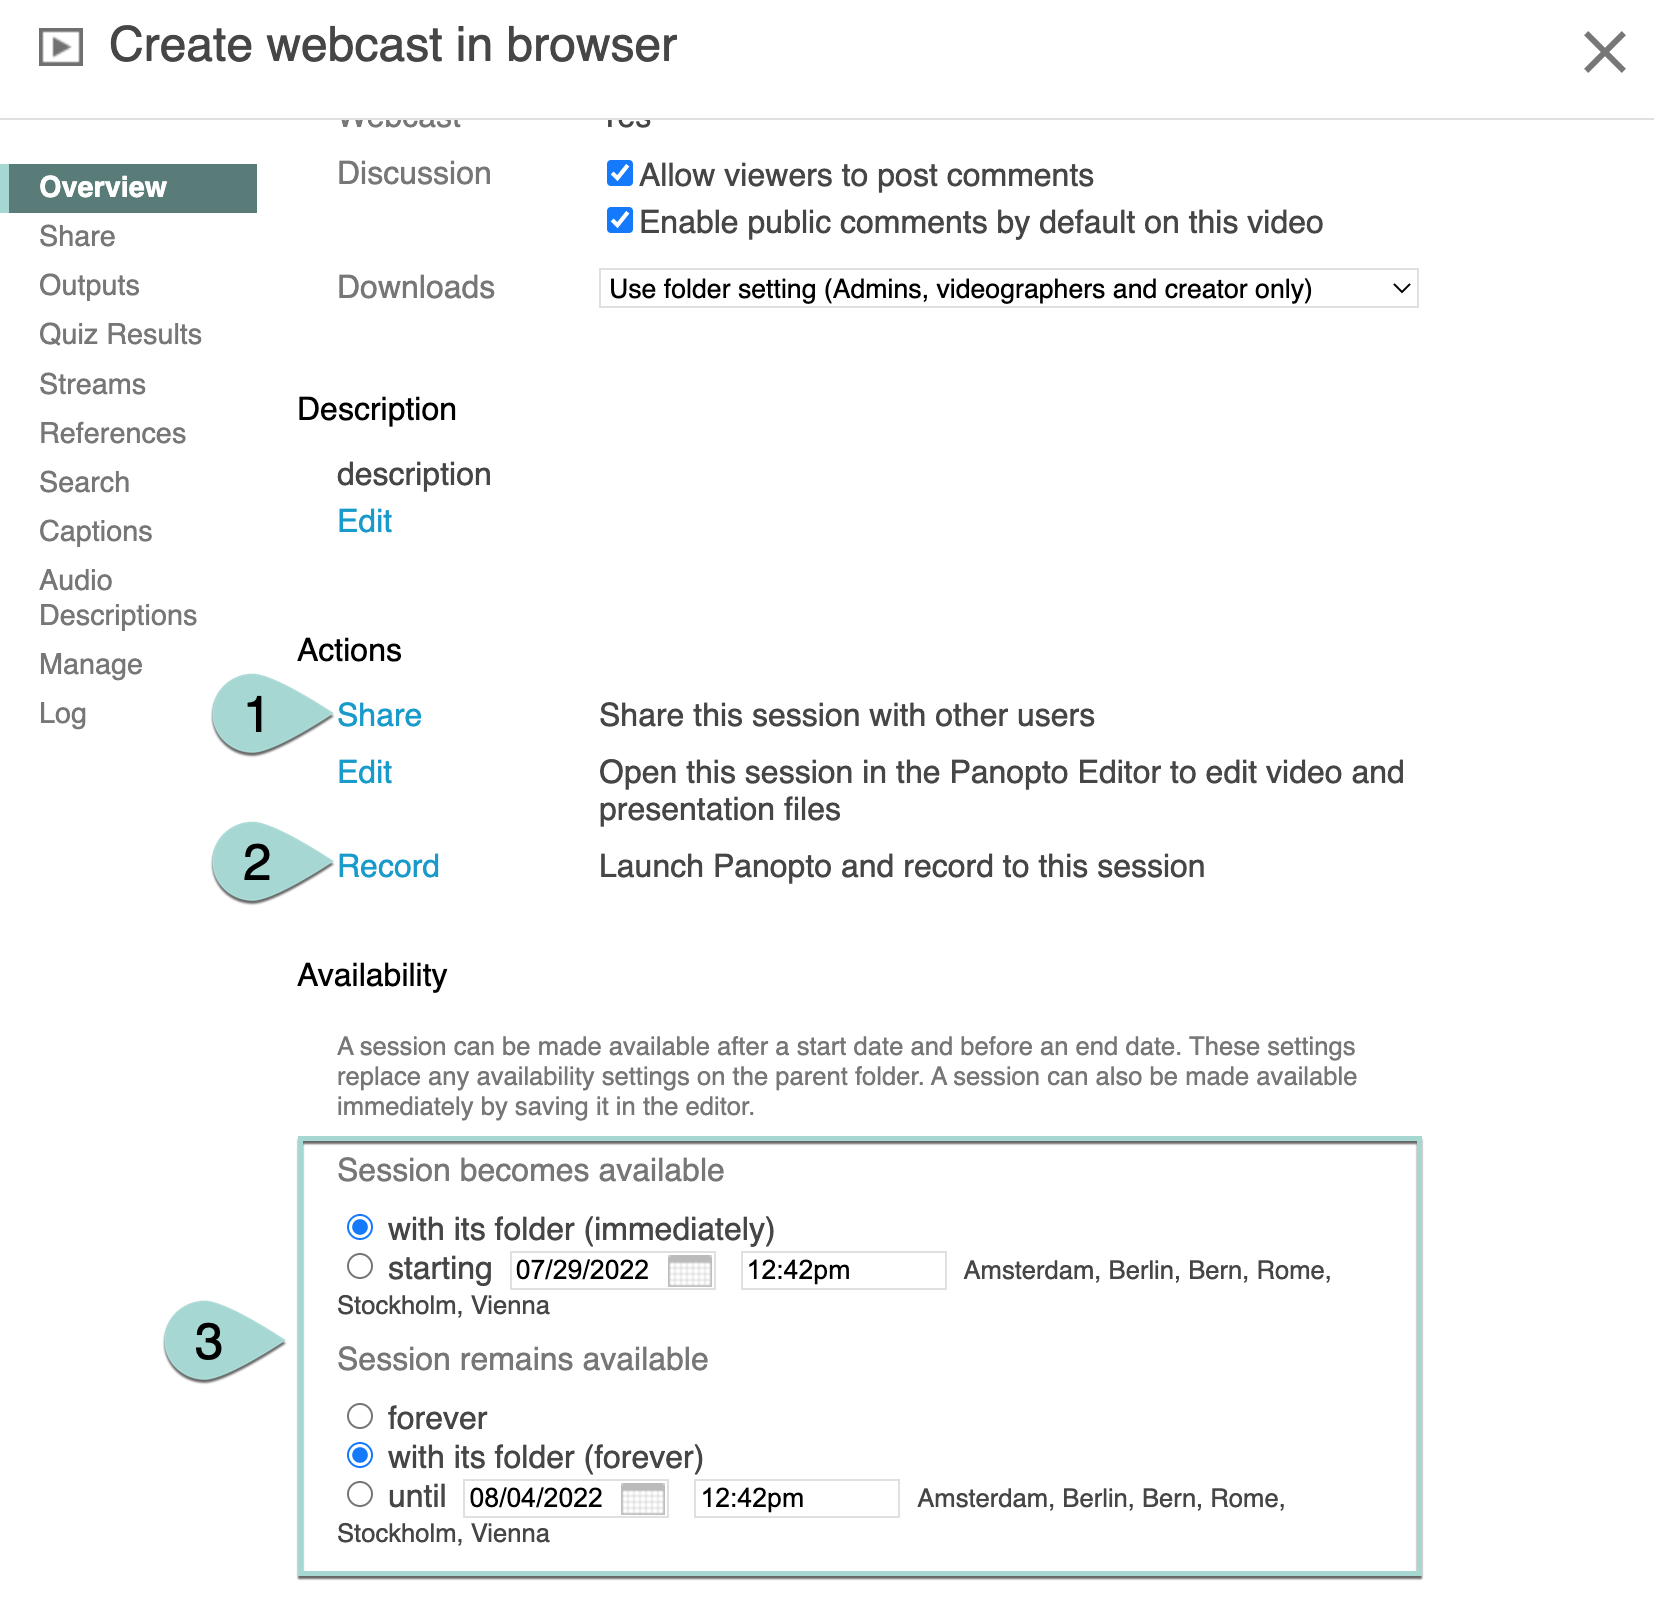
Give your webcast a name (1) and description (2) and select the folder that you want to save the webcast to (3). This is important both for you and your viewers. Then click the Create button (4).Once you have created the webcast, the usual settings will appear. You can edit the details here as described earlier in this chapter. You can decide who you want to share the video with (1) and whether the video will be available immediately and permanently or for a certain period of time (3). And, importantly, you can record the video (2). When you click on the Record link, you will be redirected to the Panopto app.
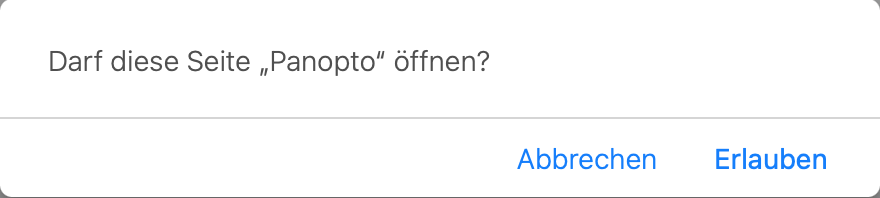
Before you are redirected, you will be asked whether your browser is allowed to open the app. Click on Allow / Erlauben.
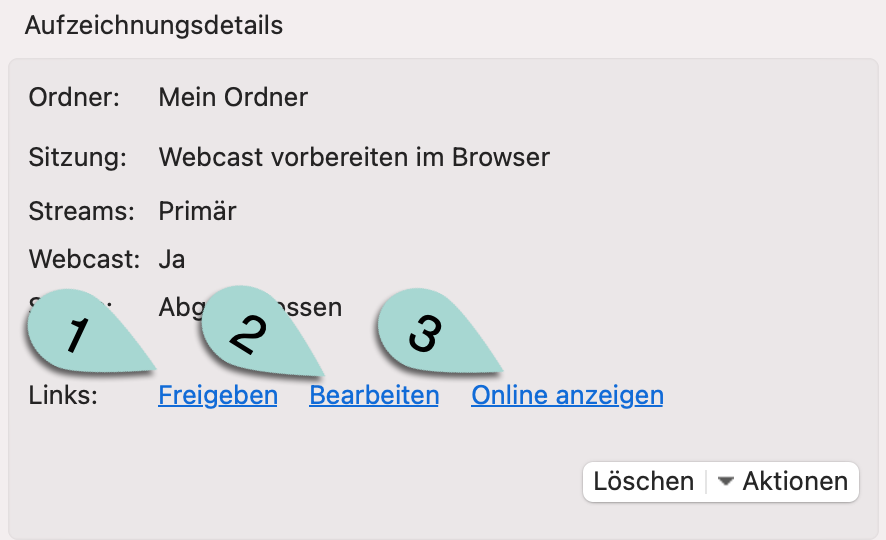
Record your video as usual. When you have finished recording, you will be redirected to an overview with three links: Share / Freigeben (1), Edit / Bearbeiten (2) and View online / Online anzeigen (3). These three links will take you to their respective options in the browser. Select what you need for your webcast. Your webcast will then be ready and available at the time you specified.
Click on one of the following links for a more detailed explanation according to your operating system:
How to Create and Share a Live Webcast with Panopto for Windows
How to Create a Live Webcast with Panopto for Mac
License
University of Basel