RECORD AND ADD AUDIO TO POWERPOINT
2.3
Procedure
There are several ways to add sound to a presentation. Here we explain how you can make a record slide by slide.

You can also start your presentation as a whole and record yourself speaking while you go through your slides, just like in front of an audience. What we describe in the following has two advantages over this approach: (1) you don’t have to start from scratch if you make a mistake and (2) you avoid losses in the audio track that occur at certain transitions. Note the differences between Mac and Windows (described below).
Mac
- If you already have an existing PowerPoint presentation, please open it. If you don’t have a set of slides yet, create one or consider using option 2 “Record audio with voice recording software” (Chapter 3).
- Keep your notes ready for the lecture or for the individual slides.
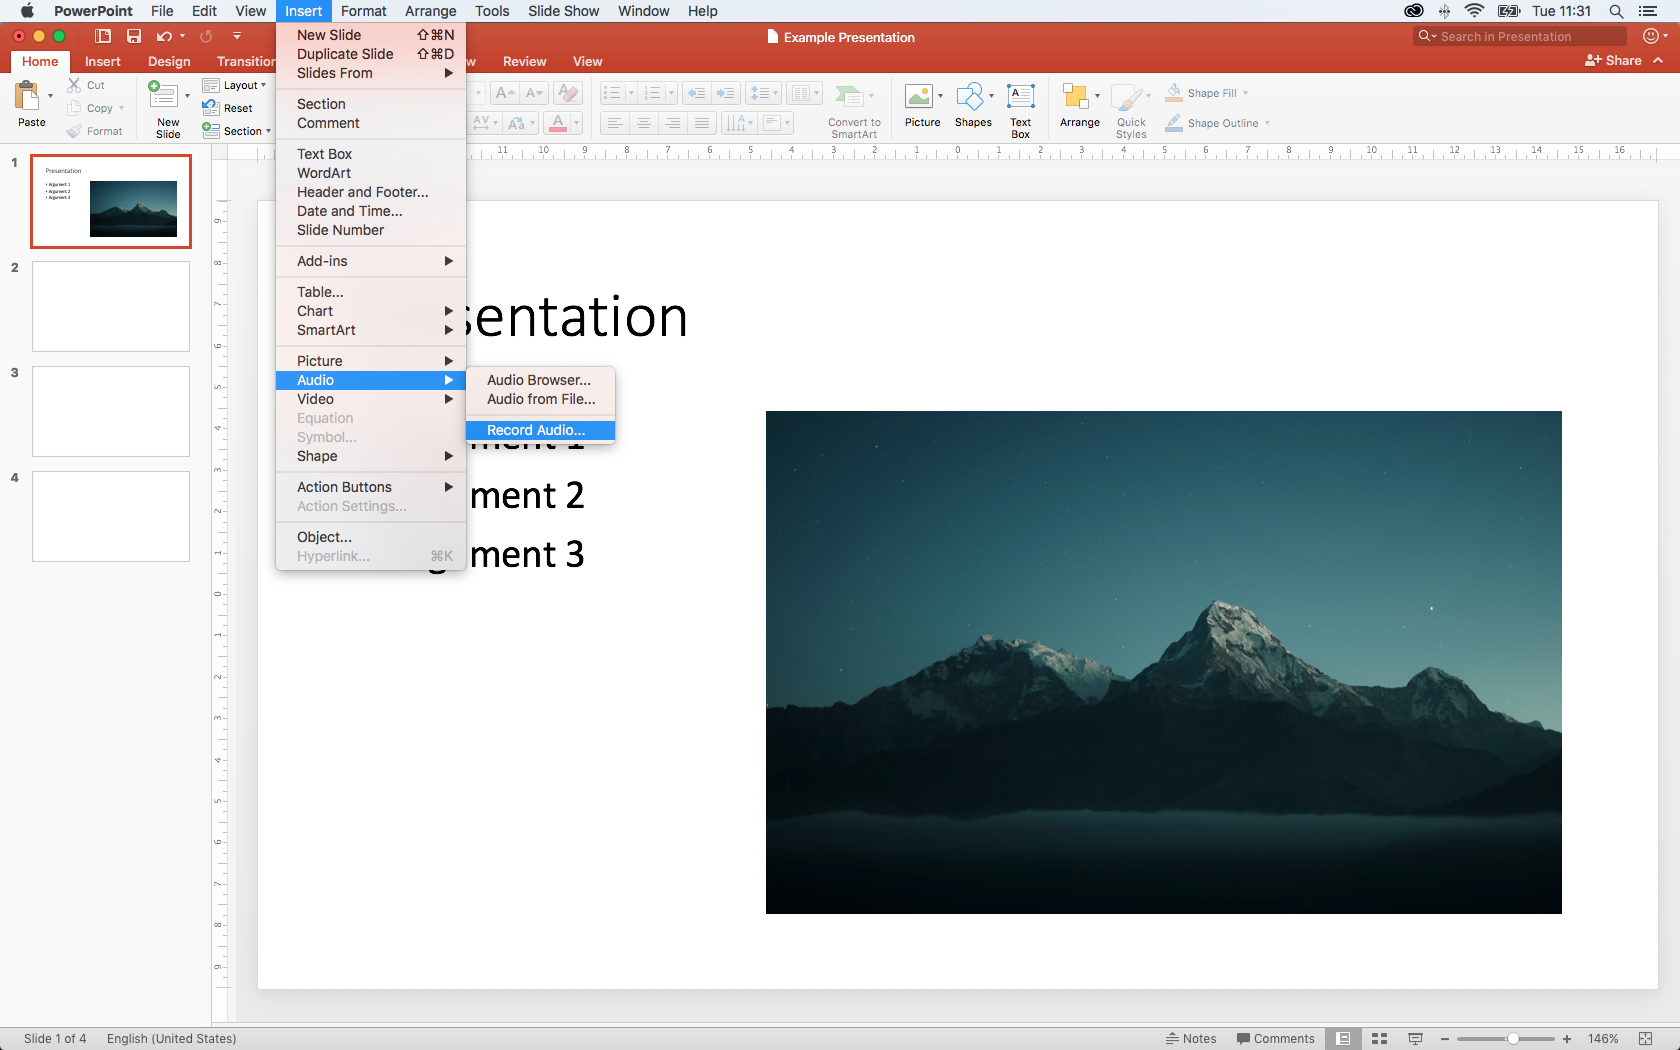
- Move from slide to slide and record the text by clicking Insert > Audio > Record Audio. The Record Sound box opens.
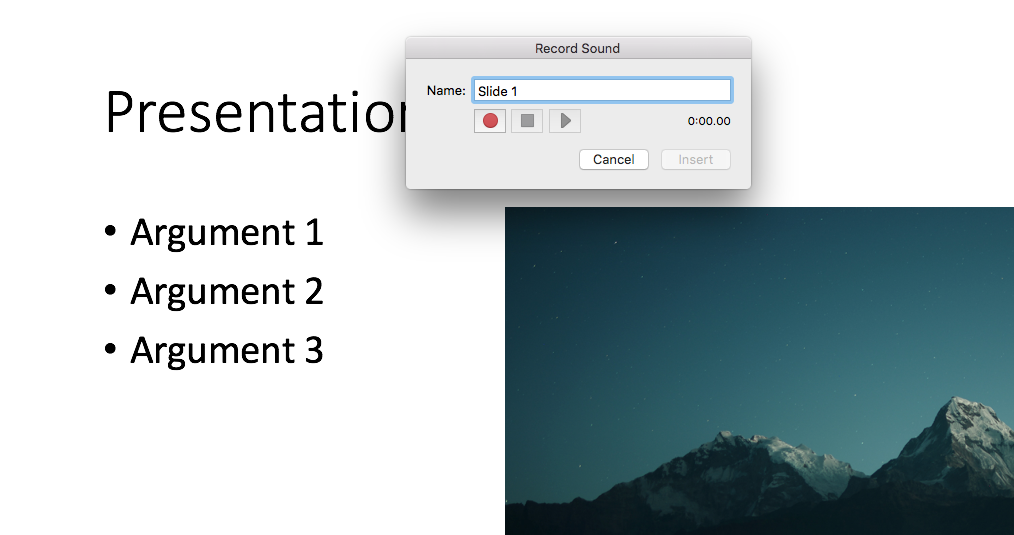
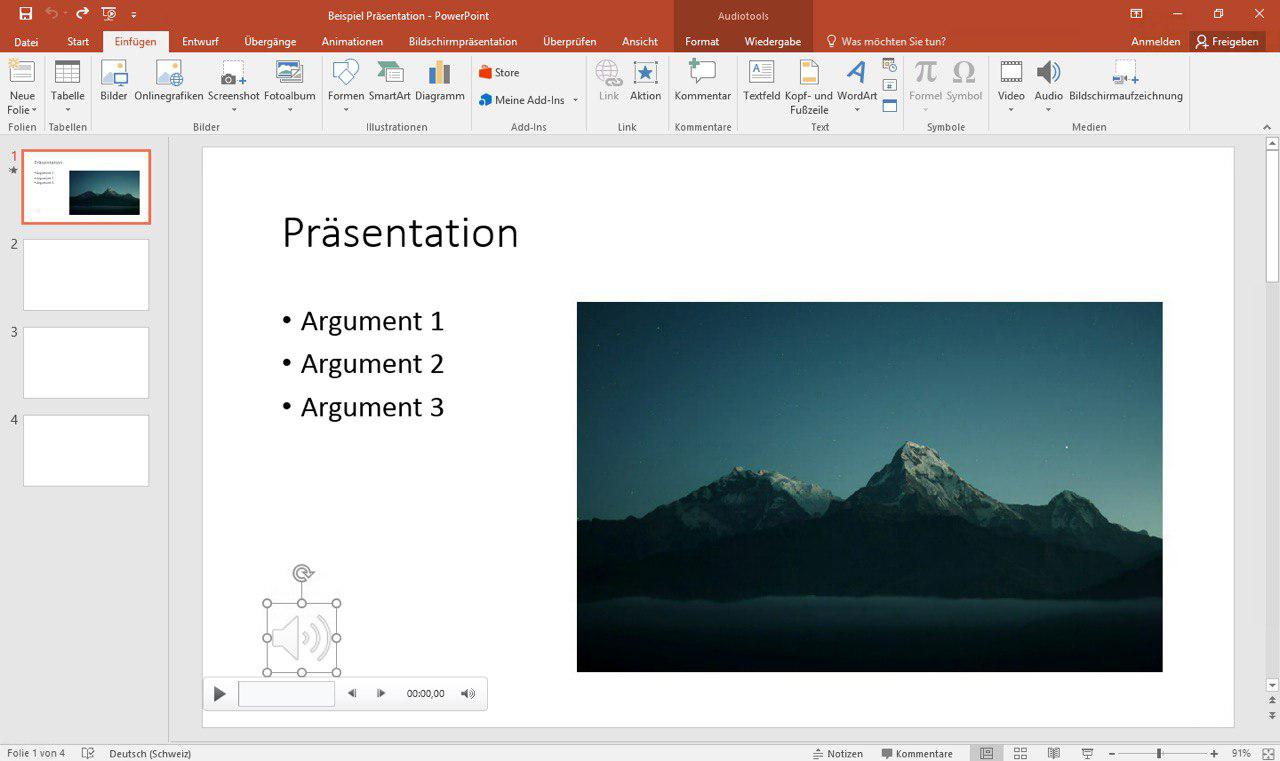
- Select a name (e.g. Slide 1), click on the red circle (Record Button) and record your text. Then click on the black square (Stop Button) to stop the recording. Click on Insert to embed the recording within the slide.
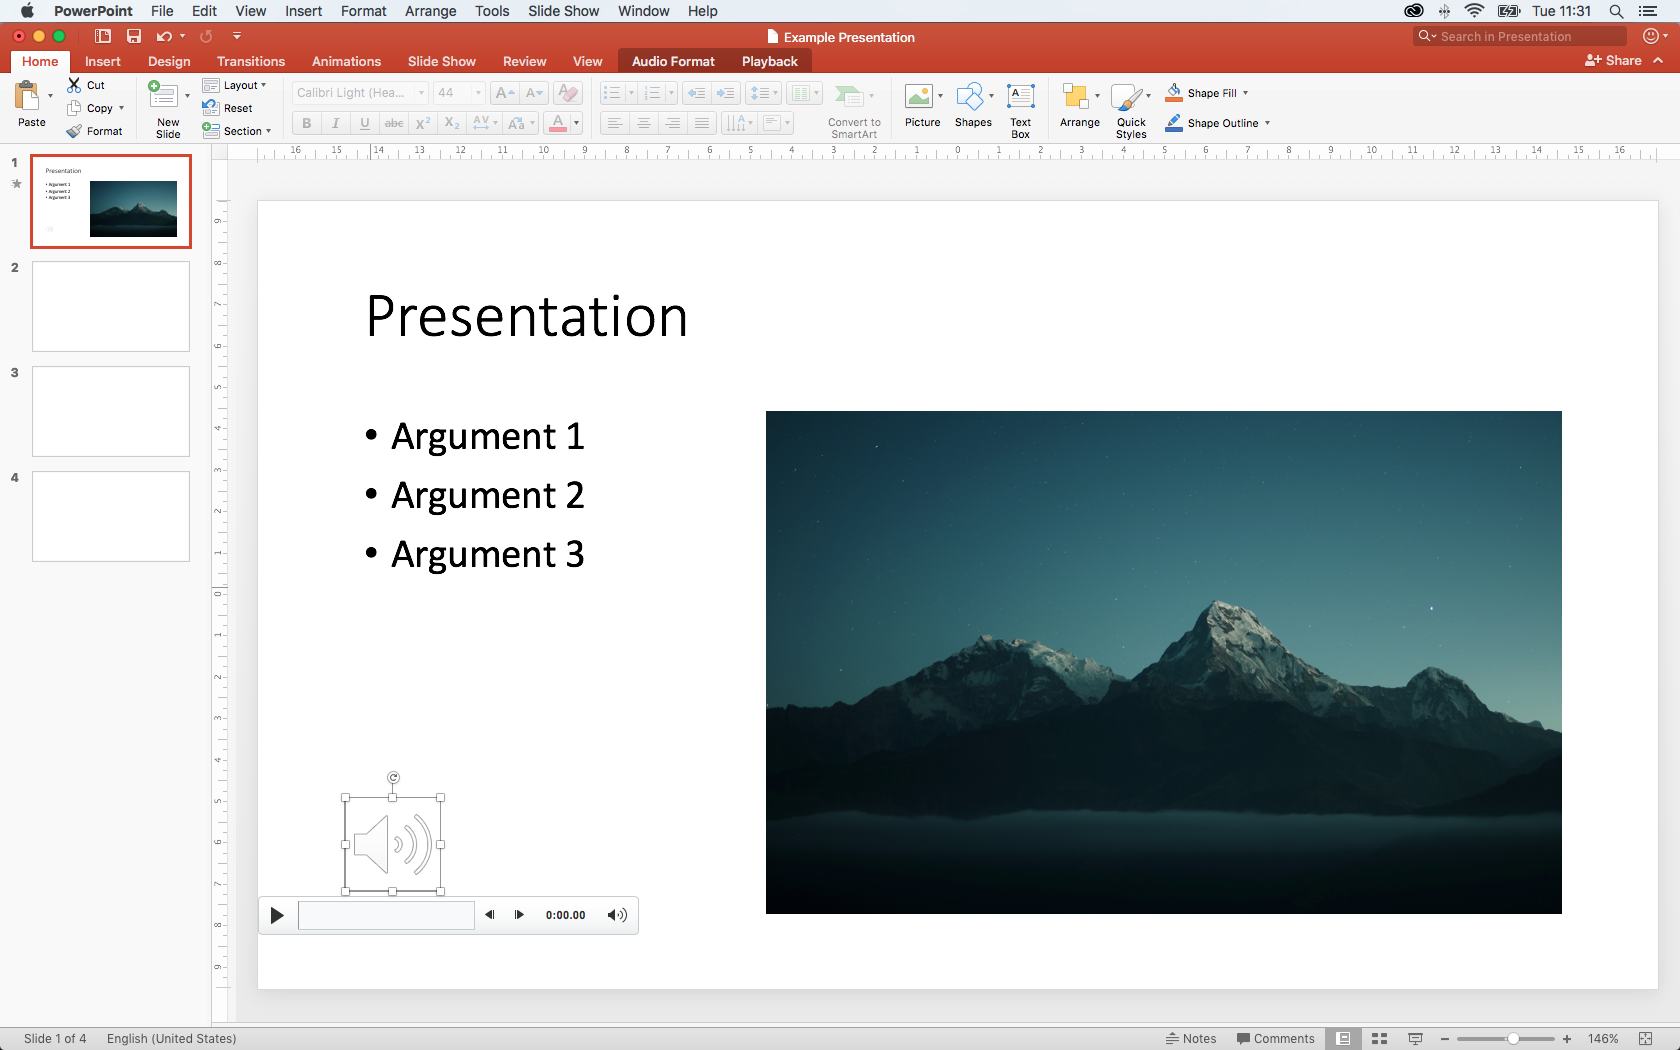
- Place the icon for the recording in a suitable place on the slide.
- Save your PowerPoint presentation (File > Save). Make sure that the presentation is in the .pptx format, not in the .ppt format – otherwise your audio recordings will be lost. Now go to the next slide for which you want to record an audio commentary.
- When you have placed all the voice recordings on each slide, save the presentation once more. By now you should use a name that is also meaningful to the students (e.g. title, lecture number etc.).
Windows
- If you already have an existing PowerPoint presentation, please open it. If you don’t have a set of slides yet, create one or consider using option 2 “Record audio with voice recording software” Chapter 3.
- Keep your notes ready for the lecture or for the individual slides.
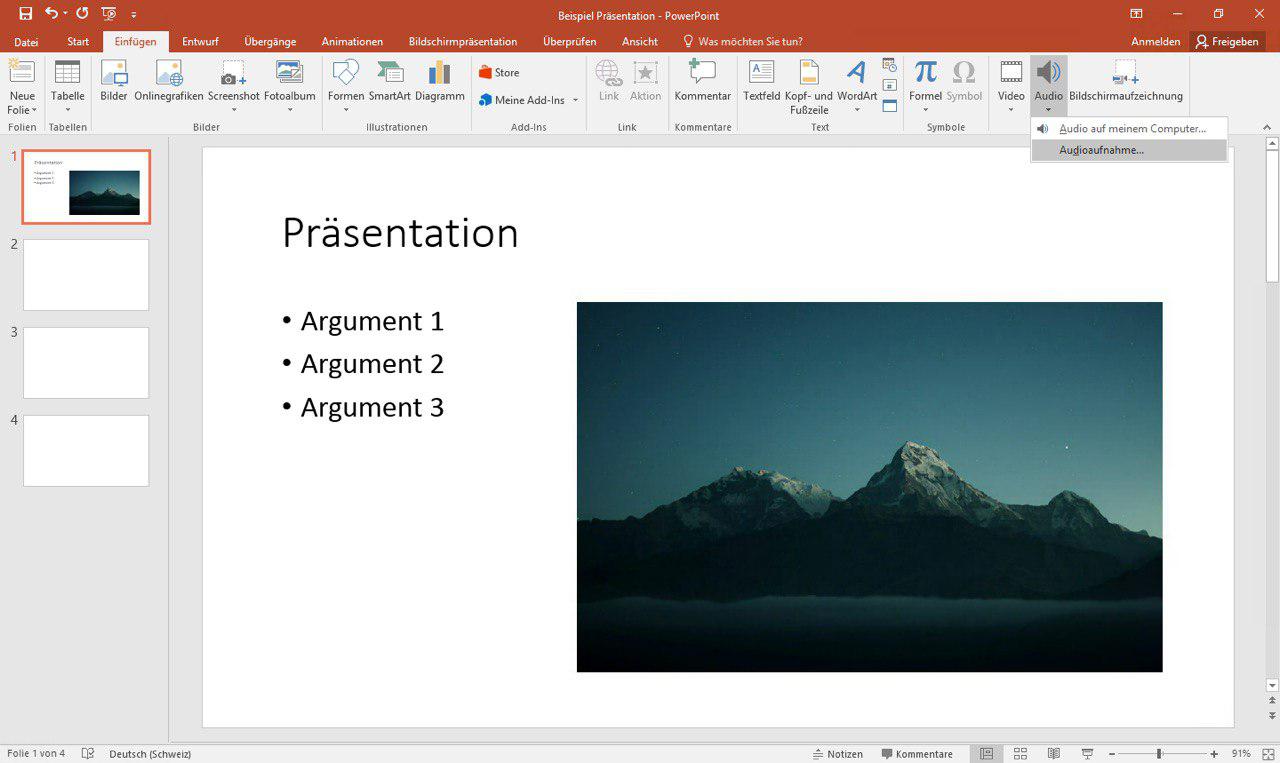
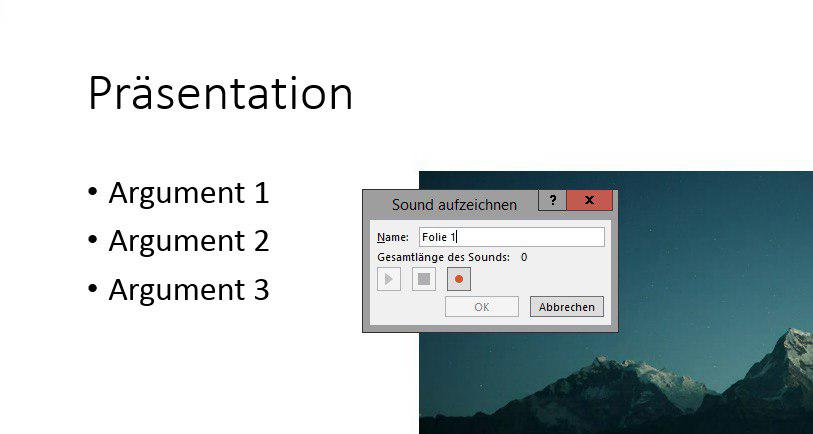
- Move from slide to slide and record the text by clicking Insert > Audio > Record Audio. The Record Sound box opens.
- Select a name (e.g. Slide 1), click on the red circle (Record Button) and record your text. Then click on the square (Stop Button) to stop the recording. Click on OK to embed the recording within the slide.
- Place the icon for the recording in a suitable place on the slide.
- Save your PowerPoint presentation (File > Save). Make sure that the presentation is in the .pptx format, not in the .ppt format – otherwise your audio recordings will be lost. Now go to the next slide for which you want to record an audio commentary.
- When you have placed all the voice recordings on each slide, save the presentation once more. By now you should use a name that is also meaningful to the students (e.g. title, lecture number etc.).
License
University of Basel